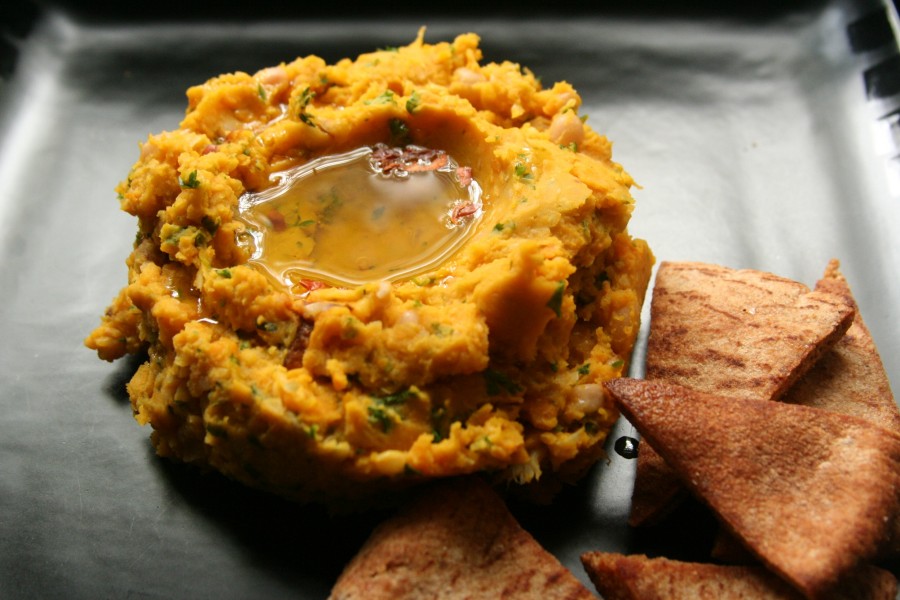
I always love to create new dips with seasonal ingredients. Once you learn the base behind making pestos, bean dips and salsas, you are really set to turn almost anything into a dip. This white bean dip uses almost the exact same logic behind making a traditional chickpea hummus. I start with a cooked bean, something to make it smooth (oil), something acidic to cut the fat (lemon juice) something to give it an edge (garlic), something to make it creamy (pumpkin; in hummus/tahini would be used) and lots of fresh herbs and spices. I used a food processor for this recipe many times and it does make for a very smooth and delicious dip, but lately I have much preferred this more rustic version. Some of the beans get mashed, some stay whole and I really enjoy being able to identify all the different ingredients that make this dip so intensely flavourful.
This is what you will need to make this delicious dip:
- 3 cups navy beans (or other white beans) pre-soaked and cooked with salt until very soft.
- 2 cups cooked, Japanese pumpkin aka kabocha squash (or other winter squash.)
- 1 head garlic, wrapped up in foil and roasted until soft.
- Juice of 1 lemon
- ¼ cup extra virgin olive oil
- Salt to taste
- A few grinds of fresh ground black pepper
- ¼ tsp red pepper flakes
All or some of the herbs listed below:
- ½ cup chopped parsley
- ¼ sliced scallions
- 4-6 sprigs of thyme, leaves pulled off stems.
- 1 fresh sage leaf or 1 sprig of fresh oregano finely chopped.
Directions: place the soft beans, peeled garlic and cooked squash into a large mixing bowl. Mash with a potato masher or fork. Focus on the cloves of garlic, as the rest will figure itself out. Add the rest of the ingredients and mix. Serve on a plate, make a little well in the center of the dip with the back of a spoon and put some more olive oil and red pepper flakes.
Chef’s tip: I usually cut the squash in half and bake it flat on a tray until soft, about 30-40 minutes on 350F/180C. When it cools enough, I either peel it or spoon out the flesh. I also throw the garlic wrapped up on the same tray with the pumpkin and take it out when soft, for about 25 minutes. Peeling the roasted garlic can be messy. I usually put gloves on, slice off the top of one end and squeeze the base. Most of the cloves will ooze out, but some will need serious intervention.
You can serve this with pita chips, celery sticks, radish wedges, or on the Shabbos table with Challah. Enjoy!
Photograph by Itta Roth


