Posted on

Finding the Purim Spirit Through Learning

As life goes on, Purim becomes less and less magical. As children, we learn about the holiday, we dress up, make our lists of who gets Shalach Manot, and plan which parties are worth attending. When we get older, dressing up becomes less important, Shalach Manot becomes a chore, and the importance of learning about the holiday is diminished. After all, who has time to sit down and learn when we have to worry about the fifty-seven food packages to assemble for our children’s friends?

Growing up, my mother always said, “I’m not dressing up this year, I’m not in the mood,” and every year I convinced her that it would get her into the spirit of the holiday. Every year she conceded to my begging and pleading, wearing a Renaissance style dress with a beautiful mask.

As Purim has been inching closer, I realized that for the last couple of years, taking care of everything has caused me to lose sight of my Purim spirit. Despite my generally elaborate costumes, last year, my costume was just a mask. I never want to be “not in the mood” to enjoy and partake in this holiday!

In order to renew my excitement, I invited a few friends to my house to learn about the holiday. In my search of a new perspective on Purim, I found a real gem. The Torah Anthology has a wonderful translation from the Me’am Loez that has a take on the Purim story that I have never encountered. With each pasuk (in Hebrew, and translated) comes a commentary that is an easy read, but is packed with some serious learning. Going through this book has really revved up my enthusiasm for this coming Saturday night.

TorahAnthologyEsther

This commentary discusses the ancestry of Achashverosh (his father was raised by a dog?), the miscalculations of the prophecy of the 70 years (how many times could they miscalculate with such conviction?), as well as the relationship that Mordechai and Esther had (an old discussion with a new twist). There are in depth explanations of the parties that happen throughout, as well as why the Jews had to go through this ordeal.

The more we learn about Purim, the clearer the miracle is, and the more we want to celebrate. Although I have not gotten everything planned for this weekend, I know that I will be running from place to place with an excitement that was lacking last year. May we never lose sight of the hidden miracles that Hashem provides every day that will lead us to the final redemption.

P.S. Mom, are you in the mood for a costume this year?

Posted on

Root Vegetable Latkes with Lemon-Saffron Yogurt

Two nights left to cook = Two Way Latkes!!

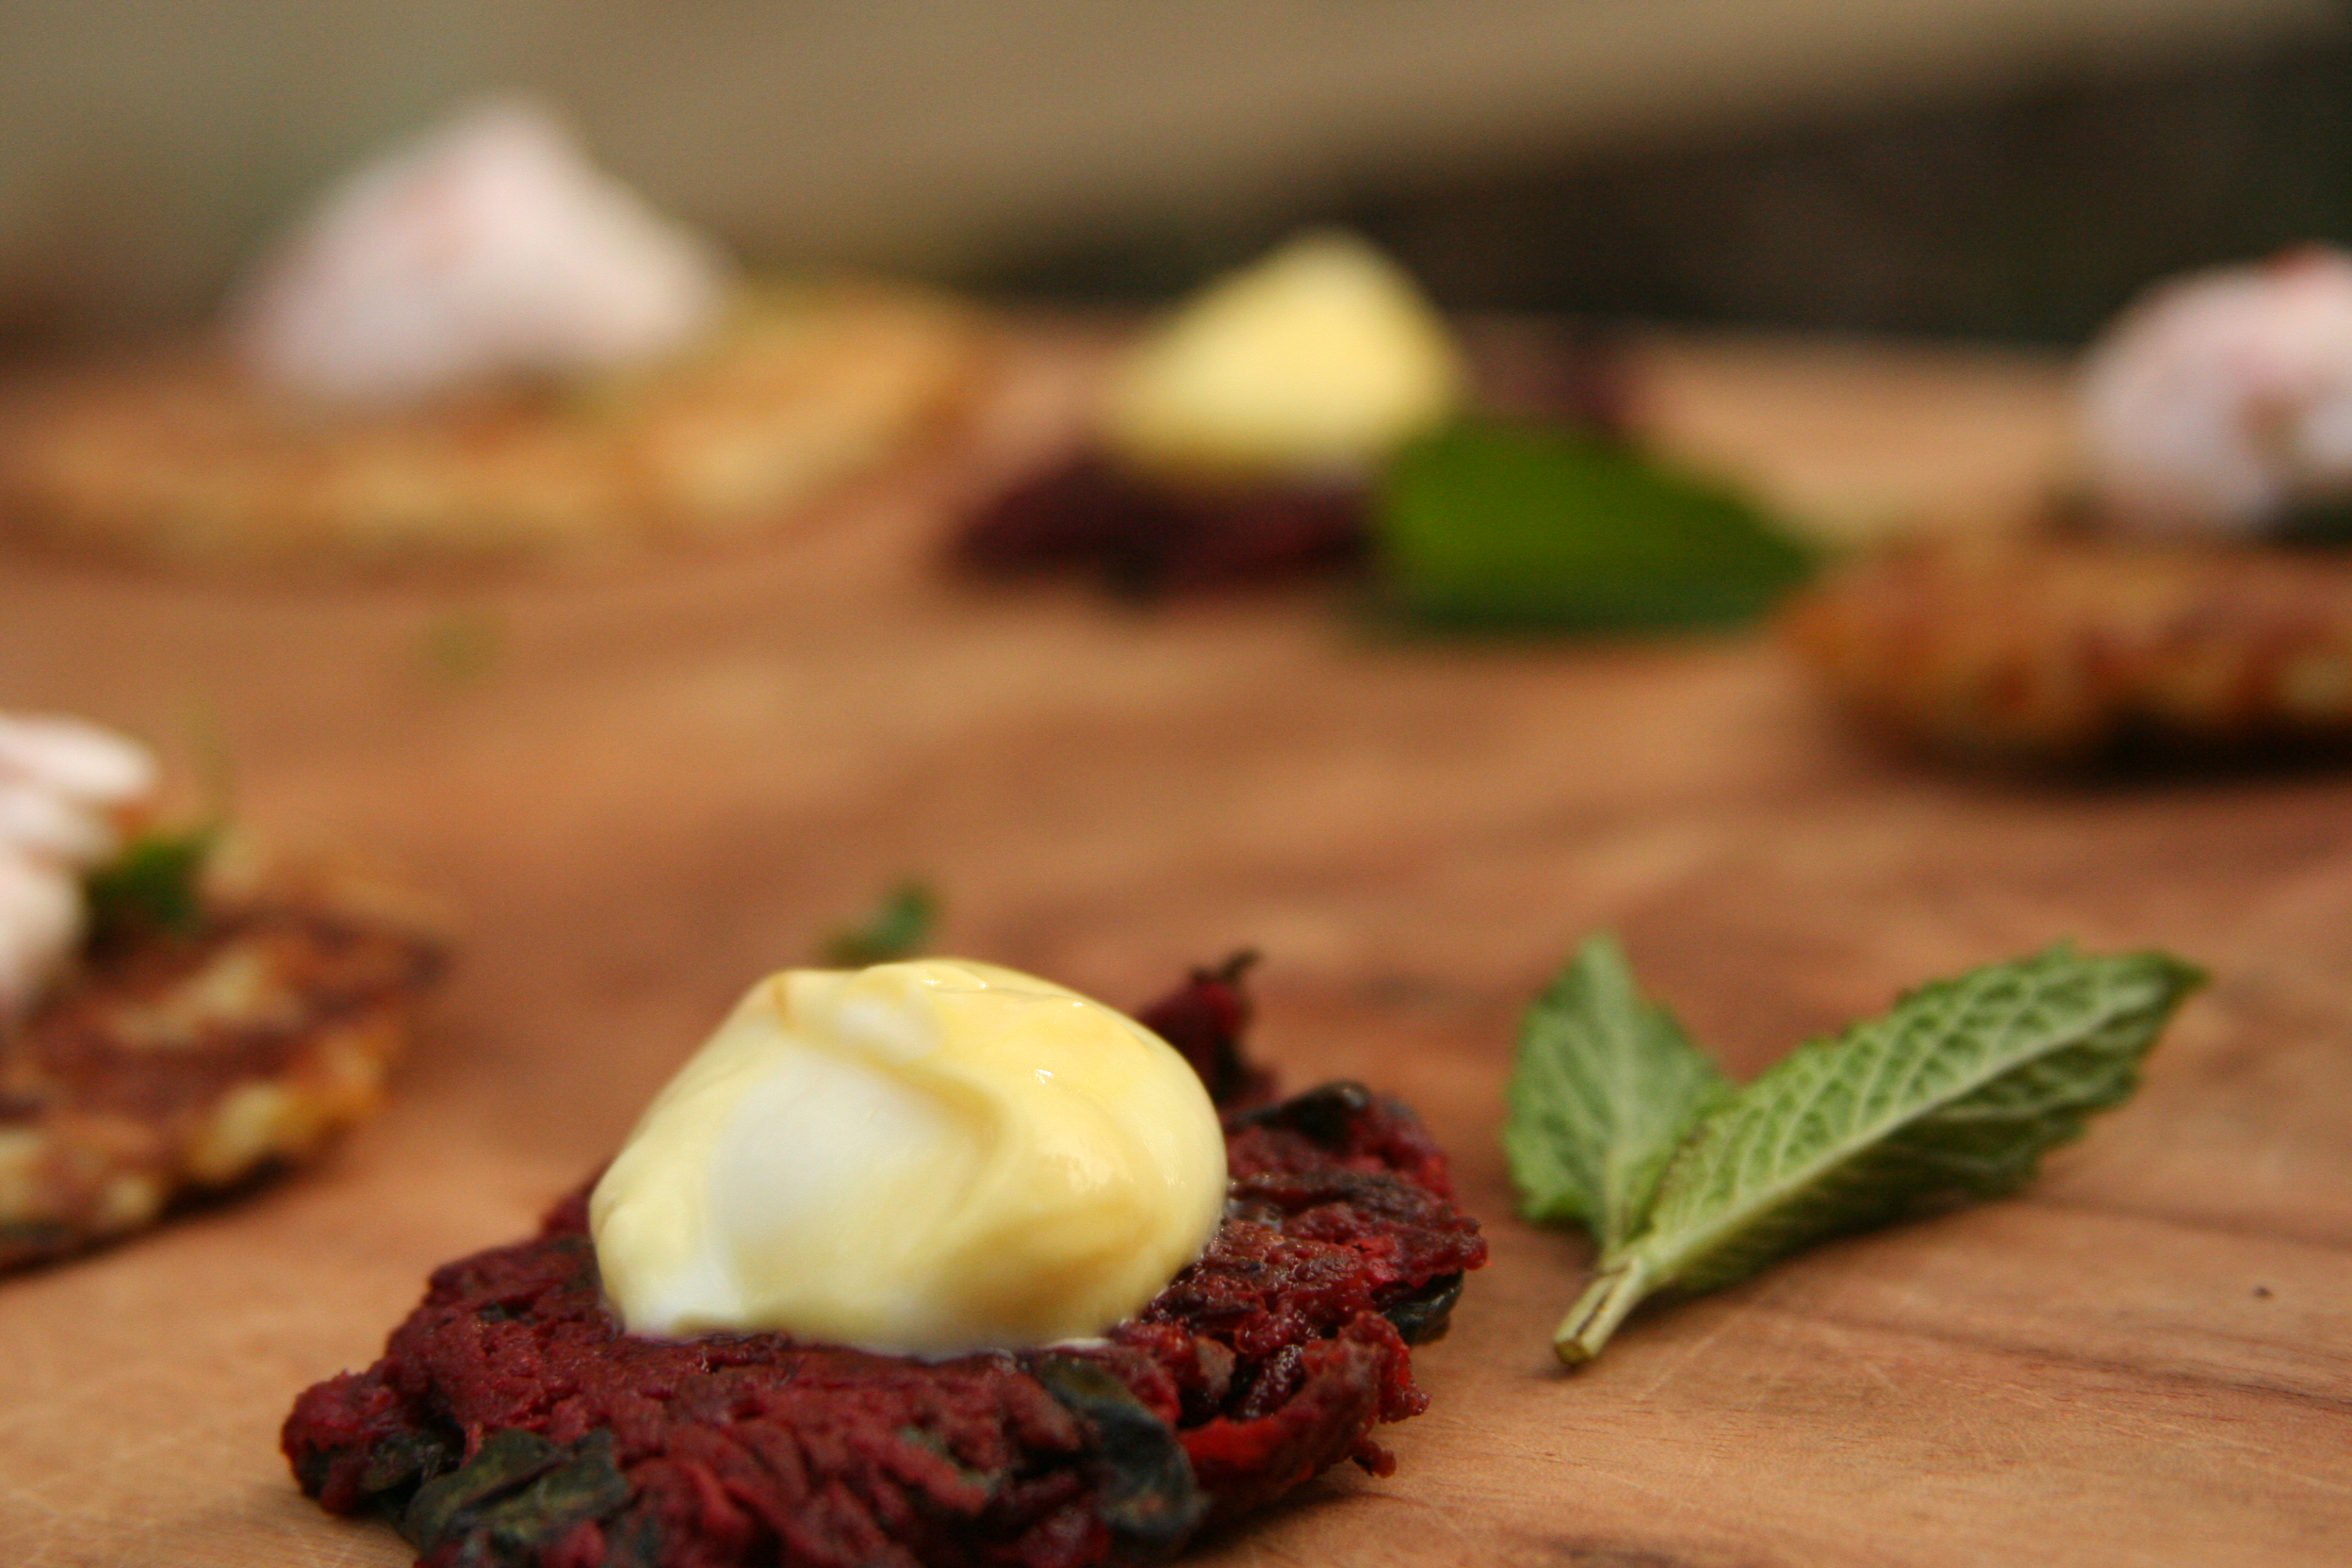
Beet Latkes with Lemon Saffron Yogurt & Rutabaga Latkes with Horseradish Taramosalata

I’ll be the first to admit that potato latkes are really the best kind of latkes! Especially when they’re made well – crispy, thin and fresh out of the fry pan. Here are a couple of recipes using an assortment of other vegetables you can use to perhaps boost your intake of vitamins and minerals, and to add some variation, colour and seasonal freshness to your plate.

Ingredients:

  • 1lb mixed raw root vegetables such as rutabaga, golden beets, red beets and parsnip (other turnips, celeriac and carrots are also fine, although I haven’t tried them) peeled and shredded by hand or using a food processor.
  • 1 small or ½ a red onion, minced
  • 2-3 eggs
  • ¼ c flour (almost any flour, all-purpose, whole wheat, spelt and probably many gluten free flours are also fine)
  • 2 teaspoons salt (or just a pinch of salt if using mostly beets, too much salt will stifle their natural sweetness)
  • 3 grinds black pepper
  • ½ tsp baking powder
  • ½ C peanut or grapeseed oil, (approximately) for frying

For the Beet Latkes: 1 bunch lightly cooked beet greens, squeezed and chopped, 2 tablespoons of fresh mint and parsley, zest of ½ lemon,1 tsp ground cumin, 1 tsp tahini.

For the Rutabaga Latkes: 1 tsp caraway seeds toasted over the fry pan before you start your frying, 2 tablespoons dill and/or parsley.

Lemon Saffron Yogurt Sauce for the Beet Latkes courtesy of Yotam Ottolenghi

Ingredients:

  • 1 big pinch saffron threads
  • 250g Greek yoghurt
  • 2 tsp olive oil
  • 1 tsp lemon juice
  • Salt

First make the sauce. Soak the saffron in two teaspoons of hot water for five minutes. Transfer this to a bowl, add the yogurt, oil, lemon juice, and salt to taste, and stir to combine. The sauce will keep well in the fridge.

Horseradish Taramosalata for the Rutabaga Latkes

Ingredients:

  • 1 cup sour cream
  • 1 tablespoon freshly grated horseradish
  • 2 tablespoon freshly chopped dill
  • 3 tablespoons carp roe or salmon caviar (vegetarians, just leave out. The dip is great either way).
  • Zest and juice from ½ a lemon (only if using the roe or caviar).
  • Salt
  • Combine everything and refrigerated until needed.

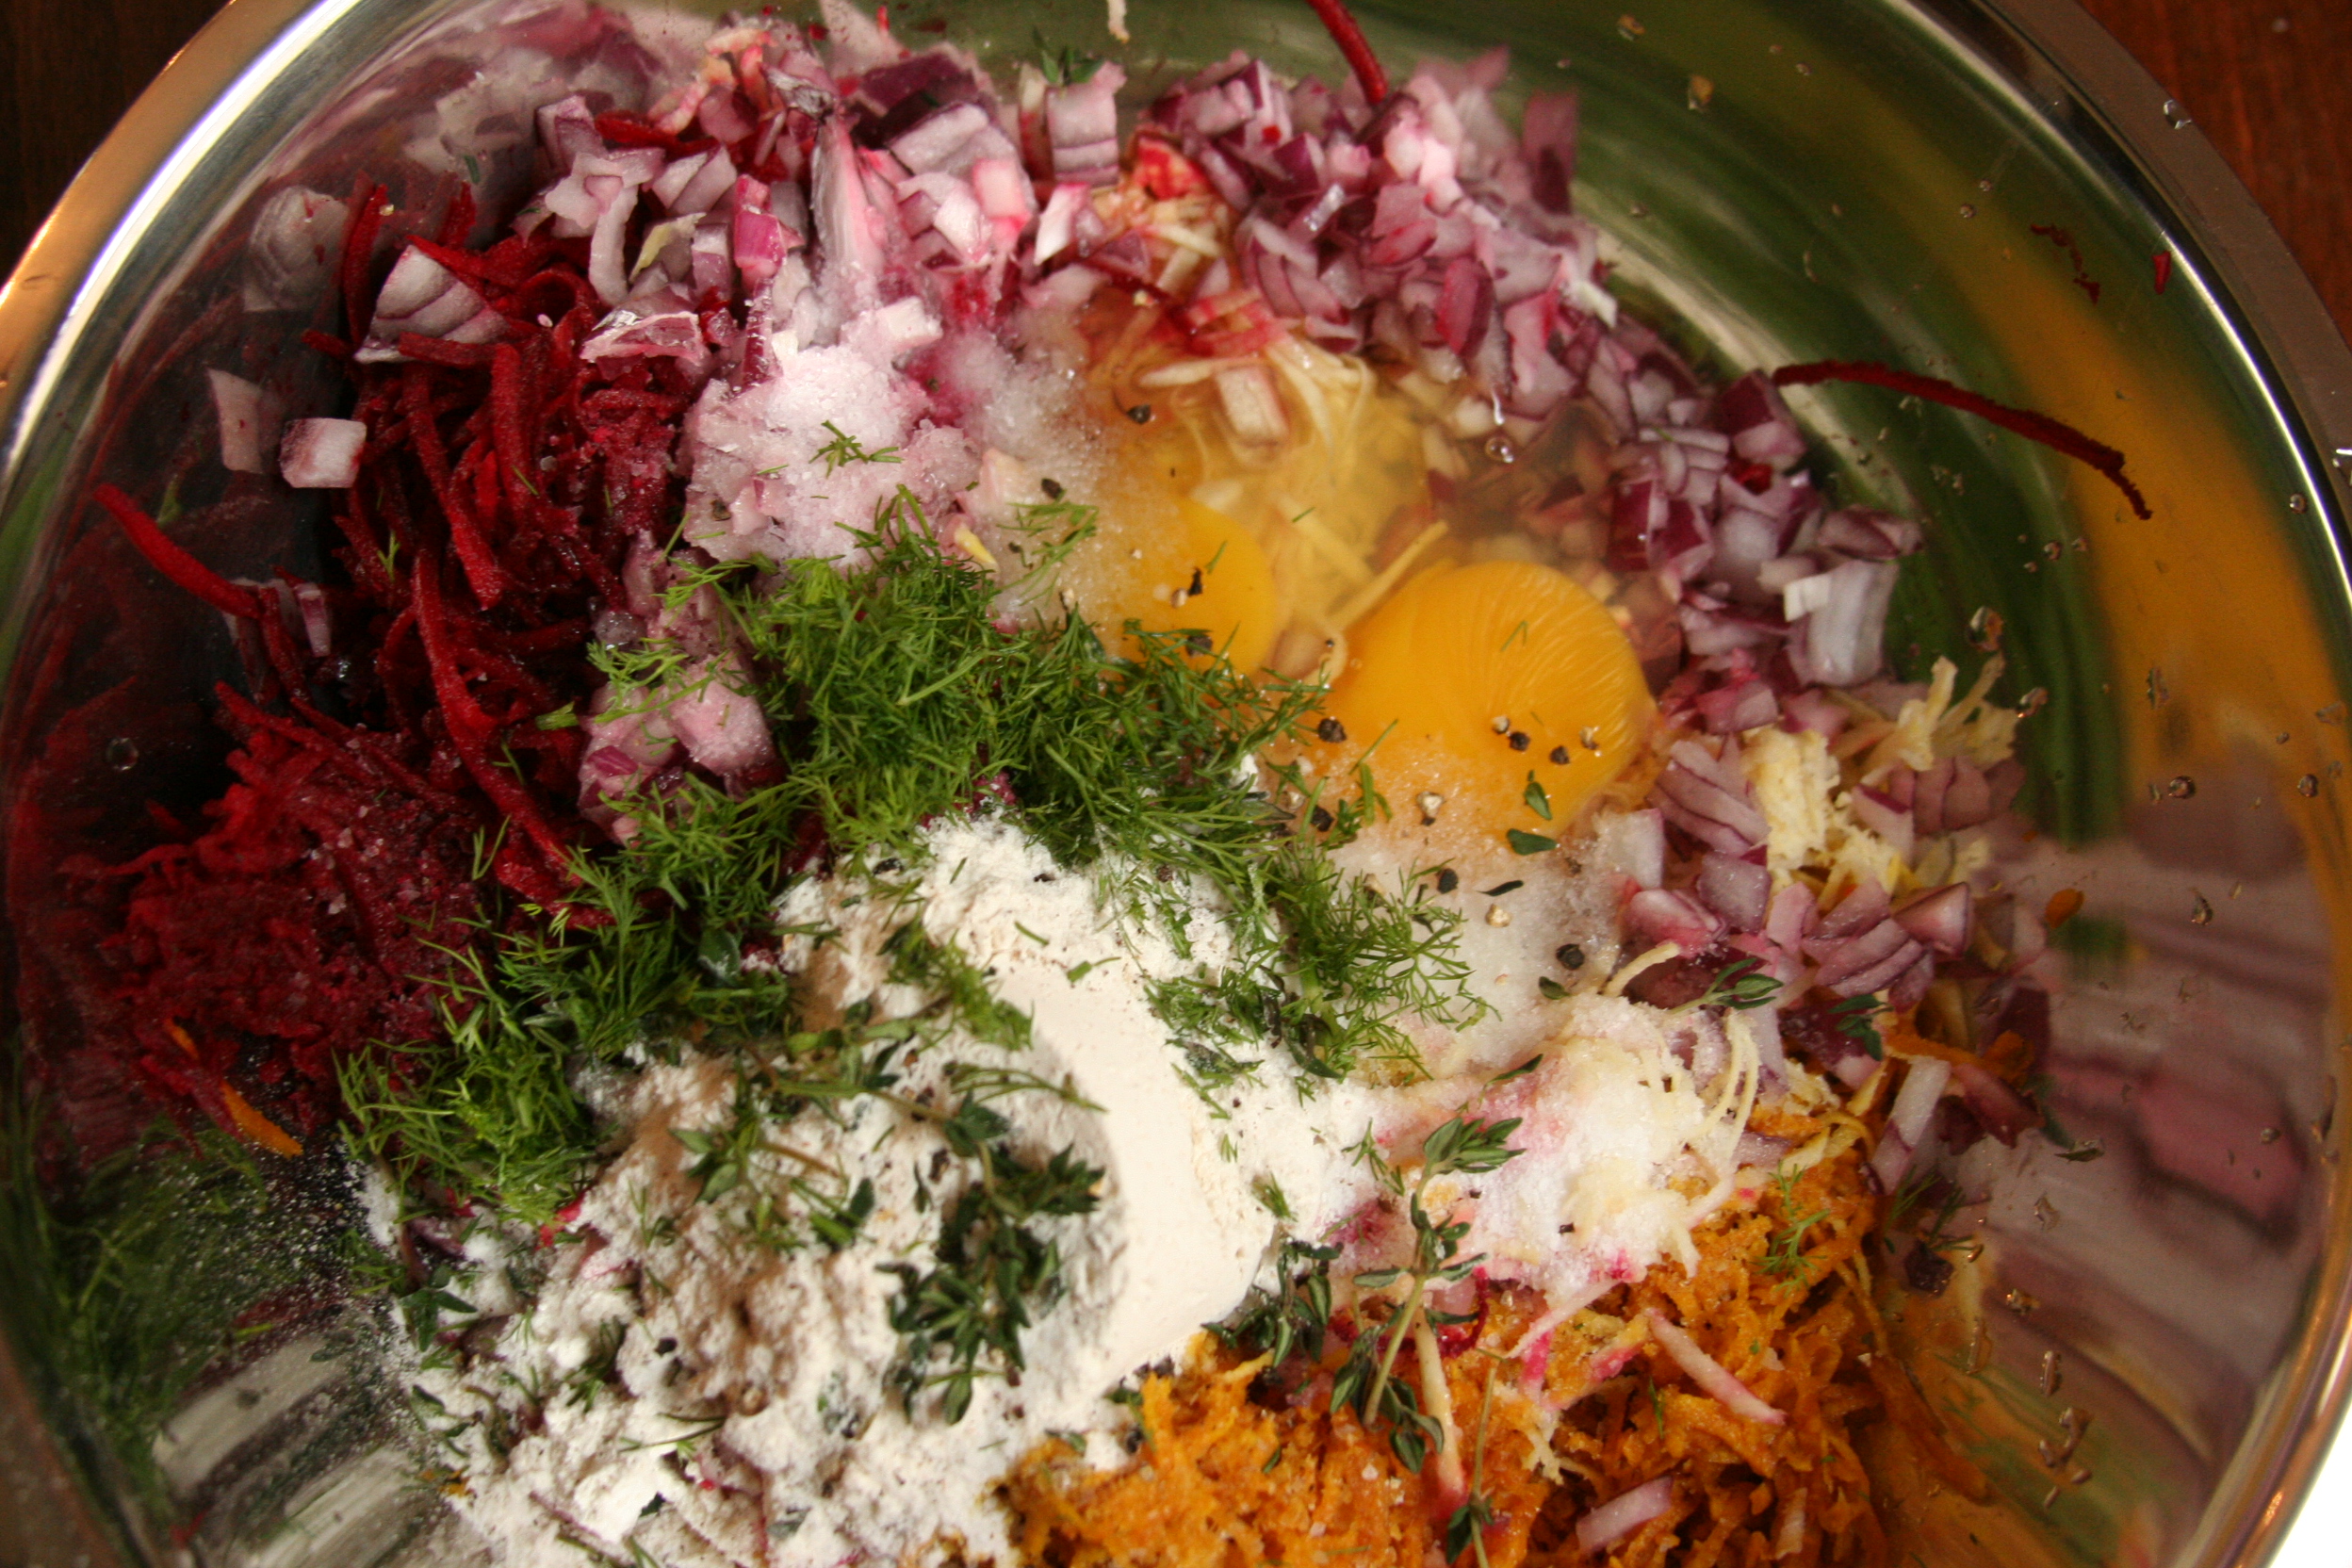
To make the latkes: Place all your ingredients into a mixing bowl and mix thoroughly. I put disposable gloves on and get down and dirty. I use three eggs; the resulting mixture is lighter, fluffier, and will give you crispier latkes, but it will work fine with fewer eggs, or egg whites if cholesterol levels are a concern. Heat a fry pan with a good amount of oil on a medium flame, and drop spoonfuls of the latke mixture, flattening them with a spatula. When you jiggle the pan and the latke loosens and seems to hold its shape, it’s ready to be flipped. I like to press them thin and cook them quickly on a higher flame.

When deciding what vegetable to use with which sauce, the answer is that it doesn’t really matter. You could use the exact same mixture of root vegetables for either the “beet” or “rutabaga” latkes, and as long as you pair the right herbs and spices with the sauces, they’ll taste great.

A Freilachen Chanukah

Posted on

Organic Gluten Free Latkes

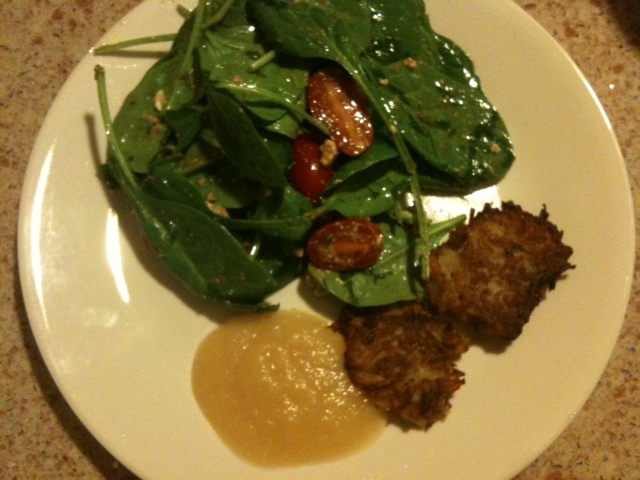
Are you looking for a perfect gluten free latke recipe for your family or guests? Look no further! These mini latkes have a classic taste and texture, and make a great appetizer for your Chanukah parties. These latkes are made extra small for an appealing presentation, and look beautiful when served with a big green salad and a side of organic applesauce!

Why make organic latkes?

Did you know that potatoes are one of the top 12 pesticide-contaminated foods? These top 12 most contaminated foods are known as “the dirty dozen” and include the fruits and vegetables that are most heavily laden with potentially harmful pesticide residue. The following is a list of the 12 most contaminated foods, followed by list of the 12 least contaminated foods. For those of us on a tight budget, simply substitute organic for the most contaminated foods whenever possible, and when buying conventional produce, stick to the least contaminated foods.

12 Most Contaminated:

▪ Peaches
▪ Apples
▪ Sweet Bell Peppers
▪ Celery
▪ Nectarines
▪ Strawberries
▪ Cherries
▪ Pears
▪ Grapes (Imported)
▪ Spinach
▪ Lettuce
▪ Potatoes

12 Least Contaminated:

▪ Onions
▪ Avocado
▪ Sweet Corn (Frozen)
▪ Pineapples
▪ Mango
▪ Asparagus
▪ Sweet Peas (Frozen)
▪ Kiwi Fruit
▪ Bananas
▪ Cabbage
▪ Broccoli
▪ Papaya

Now back to the latkes!  Here is what you will need to make your golden crispy gluten free latkes:

  • 2 pounds organic Yukon gold or Russet potatoes, peeled
  • 1 medium yellow onion, quartered
  • 1 egg
  • 1 1/2 teaspoons salt
  • 1 cup olive oil

Yield:  14-18 latkes

Directions: Peel your potatoes and place in a bowl of cold water. Using the grating disc of a food processor, grate the potatoes and place into a bowl. Using a cheesecloth, cloth napkin, or a strainer, squeeze as much liquid out of the potatoes as possible, reserving the potato liquid in a separate bowl. Let the liquid settle for five minutes, (your gluten free potato starch will settle to the bottom of the bowl). While the potato liquid settles, process the onion until smooth in the food processor and add to the grated potato. Slowly pour off the liquid from your bowl of potato liquid, and add the remaining potato starch to your grated potato mixture. Add in the egg and the salt and stir well.

Once your batter is ready, coat your frying pan with about 1/4 inch of olive oil, then turn up the heat. Add 1 heaping tablespoon of batter into the oil at a time, and flatten them slightly with your spatula.  Fry latkes until golden on the bottom- about 3 minutes on medium-high heat- then flip and fry until golden on the other side. When they are crispy and golden brown, remove from the pan and drain on paper towels if desired. Continue frying until all the batter is used up, adding in more oil to the pan as needed. Serve with organic applesauce and generous helping of your favorite green salad – and enjoy your delicious gluten free meal!

Wishing you all a Happy and Healthy Chanukah!

Posted on

Baked Cinnamon Doughnuts with Quince Cardamom Preserve

For years now, Chanuka has been synonymous with doughnuts. While gentiles are stringing up their lights, saddling up reindeer, and racking up huge electricity bills, we Jews are probably more focused on our usual preoccupation: food. Yes – miracles and wonders, olive oil, lights, transcending the physical too, but mainly food – deep fried food. We’re imaging the crispy and salty latkes and the moist creamy doughnuts. Many years ago, some clever person had the great idea to connect every single Jewish holiday to different foods, and these foods have become rituals in their own right. The whole idea at it’s core is pure outreach (so I guess a Lubavitcher thought of it?): the lost Jewish soul comes back to his grandparents’ Shabbos table with one good bowl of chicken soup.
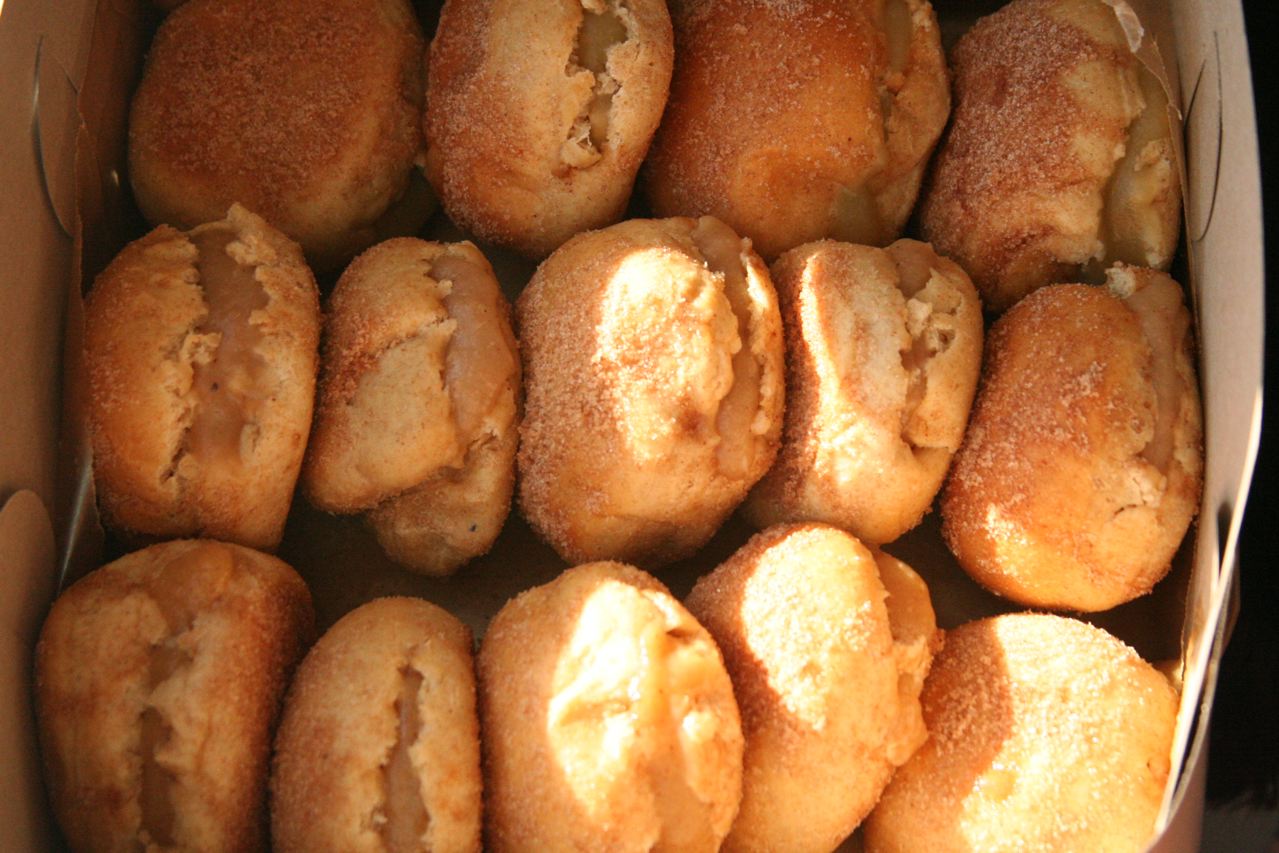
The only thing that really connects doughnuts with Chanuka is the fact that doughnuts are deep fried, which is supposed to remind us of the miracle of the oil in the Temple. Considering the recipe I’m about to give you is for baked doughnuts, not fried ones, which might seem sacrilege to some, let me just defend myself in advance; I would never choose to deep-fry something if I could make it just as good another way. Deep-frying is messy, costly and when it’s all over, the smell lingers, and someone needs a facial.

If you’re thinking that you’d be better off just buying doughnuts, then yes, you have a point. It would be so much simpler if I could just bite into a commercial doughnut and taste good quality jam or REAL custard filling, but anyone who eats discerningly knows that most of the time, food you buy just isn’t all that great. It’s one of the big reasons I bother to cook at all (unless you thought it was the calluses and burns!).

If you make your own doughnuts and fillings this year, no matter which recipe you use, let your mind wander back to the story of Chanuka, and add some personal meaning to your own recipe. Think about the heroes of the story: The Maccabim, the people that physically cleaned the desecrated Temple, and the heroine Yehudit who seduced the Syrian-Greek general Holofernes with cheese and wine before beheading him. Deep fried food? We can be more creative than that – just the same way we are probably capable of deep-frying anything, I am almost certain we are capable of attributing connection and meaning to absolutely anything.

The idea of ‘transcending the physical’ stems from the fact that the miracle of Chanuka features the number 8. To explain; a 7-day week is the norm, and the bane of our existence, but the miracle of the oil burning lasted for a full eight days. Eight is not just any random number, it is just one more than seven. 8 teachers us to try and go beyond our comfort zones and our natural state of being.

So, as this Chanuka approaches, ask yourself, “do I want another average doughnut from an average bakery, or am I going to go beyond my usual limitations and make it myself?”

For the Doughnuts (adapted from 101 Cookbooks):

  • 1 1/3 cups warm milk, 95 to 105 degrees (divided)
  • 1 packet active dry yeast (2 1/4 teaspoons)
  • 2 tablespoons butter
  • 2/3 cup sugar
  • 2 eggs
  • 5 cups all-purpose flour (I use a blend of whole wheat and white or whole spelt)
  • A pinch or two of nutmeg, freshly grated if possible
  • 1 teaspoon fine grain sea salt
  • 1/2 cup unsalted butter, melted
  • 1 1/2 cups sugar
  • 1 tablespoon cinnamon

Directions: place 1/3 cup of the warm milk in the bowl of an electric mixer. Stir in the yeast and set aside for five minutes or so. Be sure your milk isn’t too hot or it will kill the yeast. Stir the butter and sugar into the remaining cup of warm milk and add it to the yeast mixture. With a fork, stir in the eggs, flour, nutmeg, and salt – just until the flour is incorporated. With the dough hook attachment of your mixer beat the dough for a few minutes at medium speed. This is where you are going to need to make adjustments – if your dough is overly sticky, add flour a few tablespoons at a time. Too dry? Add more milk a bit at a time. You want the dough to pull away from the sides of the mixing bowl and eventually become supple and smooth. Turn it out onto a floured counter-top, knead just a few times (the dough should be barely sticky), and shape into a ball.

Transfer the dough to a buttered (or oiled) bowl, cover, put in a warm place for an hour or until the dough has roughly doubled in size.

Punch down the dough and roll it out 1/2-inch thick on your floured countertop. Use an upside down small drinking glass or a 2-3 inch cookie cutter to make circles. Transfer the circles to a parchment-lined baking sheet. Cover with a clean cloth and let rise for another 45 minutes.

Bake in a 375 degree oven until the bottoms are just golden, 8 to 10 minutes – start checking around 8. While the doughnuts are baking, place the butter in a bowl and the sugar and cinnamon in another bowl, plate or ziploc bag.

Remove the doughnuts from the oven and using a pastry brush (or you can actually dip the doughnut into the bowl of butter) brush butter over each doughnut, then a quick toss in the sugar. Depending on how many you’re making, you can just throw all the doughnuts together in the ziploc bag and give it a shake. When I’m making a ton of these I spread the sugar mixture onto a baking tray and after brushing the butter, I turn the doughnuts around once to get coated.

Makes 1 1/2 – 2 dozen medium doughnuts.

For the Quince Cardamom Preserve:

  • 3-5 quinces, peeled and chopped
  • 3-4 apples and/or pears, chopped (no need to peel if you plan on blending).
  • 3 tablespoons sugar
  • zest and juice of one lemon
  • 1 cinnamon stick
  • 1 vanilla bean cut lengthwise
  • 3 cloves
  • 4 cardamom pods.

Here’s how: add everything to a heavy-bottomed pot. (Don’t mess around with the numbers of the spices unless you have a really good memory! Remember, whatever you put in, must come out so this way you have 1, 2, 3, 4 & 5…). Add enough water to barely cover the fruit, bring to a boil, then reduce the heat to low. Stir often, keep reducing the liquid and be careful not to let it burn. Some people use a crock pot and cook the fruit overnight and you can do that, but you can also just let it bubble for as little as an hour. The longer you let it cook, the thicker it will be. When enough is enough, remove all the spices (1, 2, 3, 4!) and blend if you prefer a smoother consistency.

You can preserve the fruit by doing the whole mason-jar 10 minute hot water bath but don’t bother with that right now. When the fruit has cooled, just slice ⅓ of the way through the doughnut and spread the fruit with a knife. You can also inject it like I did one year, getting very sticky hands and wasting a lot of time.

An Optional Glaze (rather than the cinnamon and sugar):

  •  1 cup unfiltered apple juice (“cider”)
  • 2, 1 inch pieces ginger
  • 1 cup powdered/icing sugar
  • ½ teaspoon cinnamon

Like this: put the apple juice and the ginger into a small pot and boil. Keep reducing until less than half is left. When cooled, prepare the icing by combining the sugar and cinnamon and slowly add tablespoons of the reduced apple ginger mixture. Whisk until smooth. Place a wire cooling rack over a piece of parchment paper. When doughnuts are cool, dip tops into the glaze and let them rest on a wire rack until the glaze hardens.

Happy Chanukah!