Posted on

Balaboostas Pesach SWEEPStakes!

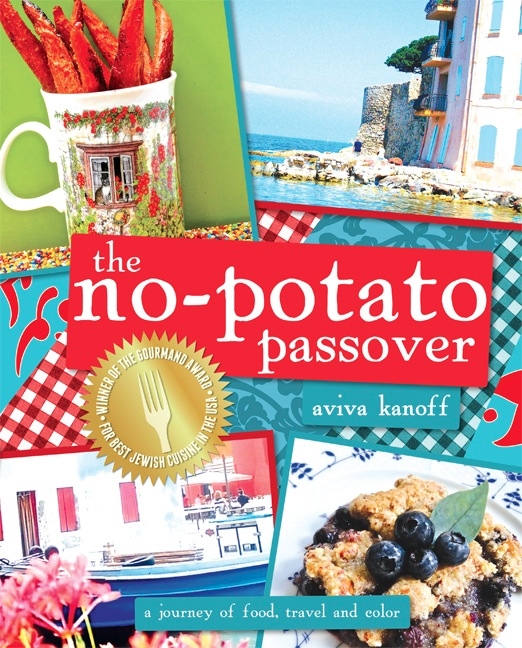
In honor of Passover, Balaboostas.com brings to one of you, the “No-Potato Passover” cookbook, by Aviva Kanoff!

Experience Aviva Kanoff’s newly revised and edited, The No-Potato Passover. Explore the tastes and colors of cultures far and near with Aviva, as she puts her creative spin on exotic cuisines just in time for Passover!

No Potato Passover Cover

Aviva Kanoff has gathered delicious, worldwide recipes to revolutionize Passover menus
everywhere. Spanning the globe, Aviva’s colorful journey takes us through the plates
and palates of a rich gastronomic experience, creating a potato-free Pesach. From Italy to
Israel, England to France, Italy to Austria, Croatia to Hungary, and as far and far-out as
Jamaica and Morocco, Aviva brings the culinary world to your kitchen workstation.

Leave behind plain potatoes this Passover and opt for healthy and creative options, such as quinoa and spaghetti squash. Make that starchy Passover substitute, the plain potato, an ingredient of Passovers past!

The recipes in The No-Potato Passover are so delicious, you’ll want to make them all
year round! The No-Potato Passover is filled with:

• Easy-to-make, user-friendly recipes, often comprised of 6 ingredients or less
• Helpful hints and tips, with specified portion and serving sizes
• Vibrant, colorful travel photography from across the world
• Original, healthy options to create fantastic dishes for Passover and all year-long
• Low-carb and gluten-free recipes

Are you convinced now?

You can enter this SWEEPStake by going to the Balaboostas Facebook Fanpage and clicking on the Sweepstakes! tab right beneath the ‘like’ button. Or you can just click here 🙂

Posted on

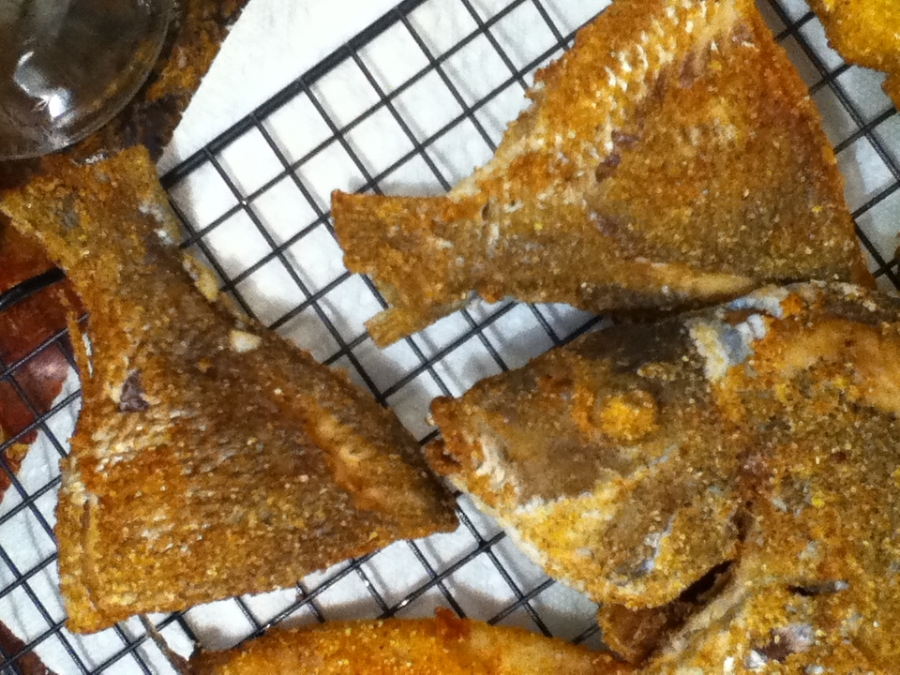
Crispy Fried Porgy

Serves: Five as an appetizer, two as a main.

Prep time: 5-10 minutes. Cook time: 6-7 minutes.

CrispyFriedPorgy

Any whole fish, fried and breaded, (the smaller the better) is my fatty food of choice. Everyone has their version this – whether it’s cupcakes, caramel, ice cream or chips – fried fish with crispy skin, so crispy that the tail and even some or all of the bones are edible is my version. Yesterday, with kids in tow on the way back from school, I realised I didn’t have anything prepared for dinner and I needed to think of something quick, easy and hopefully kid-friendly. My kids were semi-excited about this, one of them just wanted to eat the skin, but it was a gamble and at least I enjoyed it! P.S I don’t care whether this dish is trendy or in-the-moment of health conscious Americans or even if you’re surprised that I’d ever post a dish like this, I’ve had a busy week and not only is this dish so easy to prepare and write about, did I mention that it’s really good as well?

Here is what you need:

  • 2lb fresh porgy, cleaned and cut into three (head, middle & tail) or any small fish (really small fish should be kept whole)
  • 1/2 a lemon
  • A generous ¼ cup organic cornflour
  • 1 teaspoon salt
  • 1 or 2 teaspoon paprika
  • ¼ teaspoon red pepper flakes (or 2 grinds black pepper)
  • 1 cup grapeseed oil (approximately)

Directions: Rinse each piece of fish thoroughly under cold running water and drain well. Place the fish in a bowl and squeeze the lemon over the fish. Heat oil in a small heavy bottomed pot or frypan (you can choose to deep fry or to shallow fry, the only difference is in the amount of oil you use and whether you need to flip the fish. I personally shallow fry and flip, so that’s what I’ll share). While the oil is heating (please don’t leave unattended because if you do you will probably forget and then your house will burn down, so just don’t leave it) mix the flour and spices together in another bowl. One at a time, coat each piece of fish with the flour mixture, then let it rest on a plate until all are done. Once the oil is very hot, add all of the fish to the fry pan, or as many as you can fit. Fry until browned, about three or four minutes, then flip using two forks and continue frying for another two or three minutes until those fish have turned into golden crispy goddesses. Drain well. Better eaten fresh and hot but still good cold the next day.

Serve with tzatziki or a very lemony sauce.

Chef’s tip on purchasing fish:

I always suggest buying your fish from a dedicated fish market and choosing each fish yourself. Look for something with bright clear eyes and blood red gills. Tell your fishmonger how you want your fish; whether cleaned, filleted, cut or whole they will do it all right there. It might take more time compared to buying pre-cut and filleted fish in a supermarket, but it makes a huge difference in freshness. Also, you can absolutely buy kosher fish from a general fish market even if it was right next to the catfish, swordfish, shrimp and calamari. The rule is that as long as you personally observe the simanin (fins and scales) and request the knives and board to be washed, (which would probably happen regardless) you’re in the clear.

On Tzatziki:

Here are two recipes I found for tzatziki: the first one is the quick and easy version but I prefer the second one, because it’s basically the exact same thing and there are images that show you how to turn your regular store bought or homemade yogurt into greek yogurt, simply by draining it.

Photograph by Itta Roth

Posted on

Celebrating the Birthday of the Beetroot (and Her Greens!)

A little part of me feels sad when I see all those beetroots with their tops removed. Did you know that beetroots were originally cultivated in Ancient Egypt BECAUSE of their greens? The actual beet was more of an afterthought. That is why us Australians, and many other countries, refer to “beets” as beetroot – referring to the root, rather than the vague term “beets”, which refer to the whole vegetable, greens and all, I suppose.

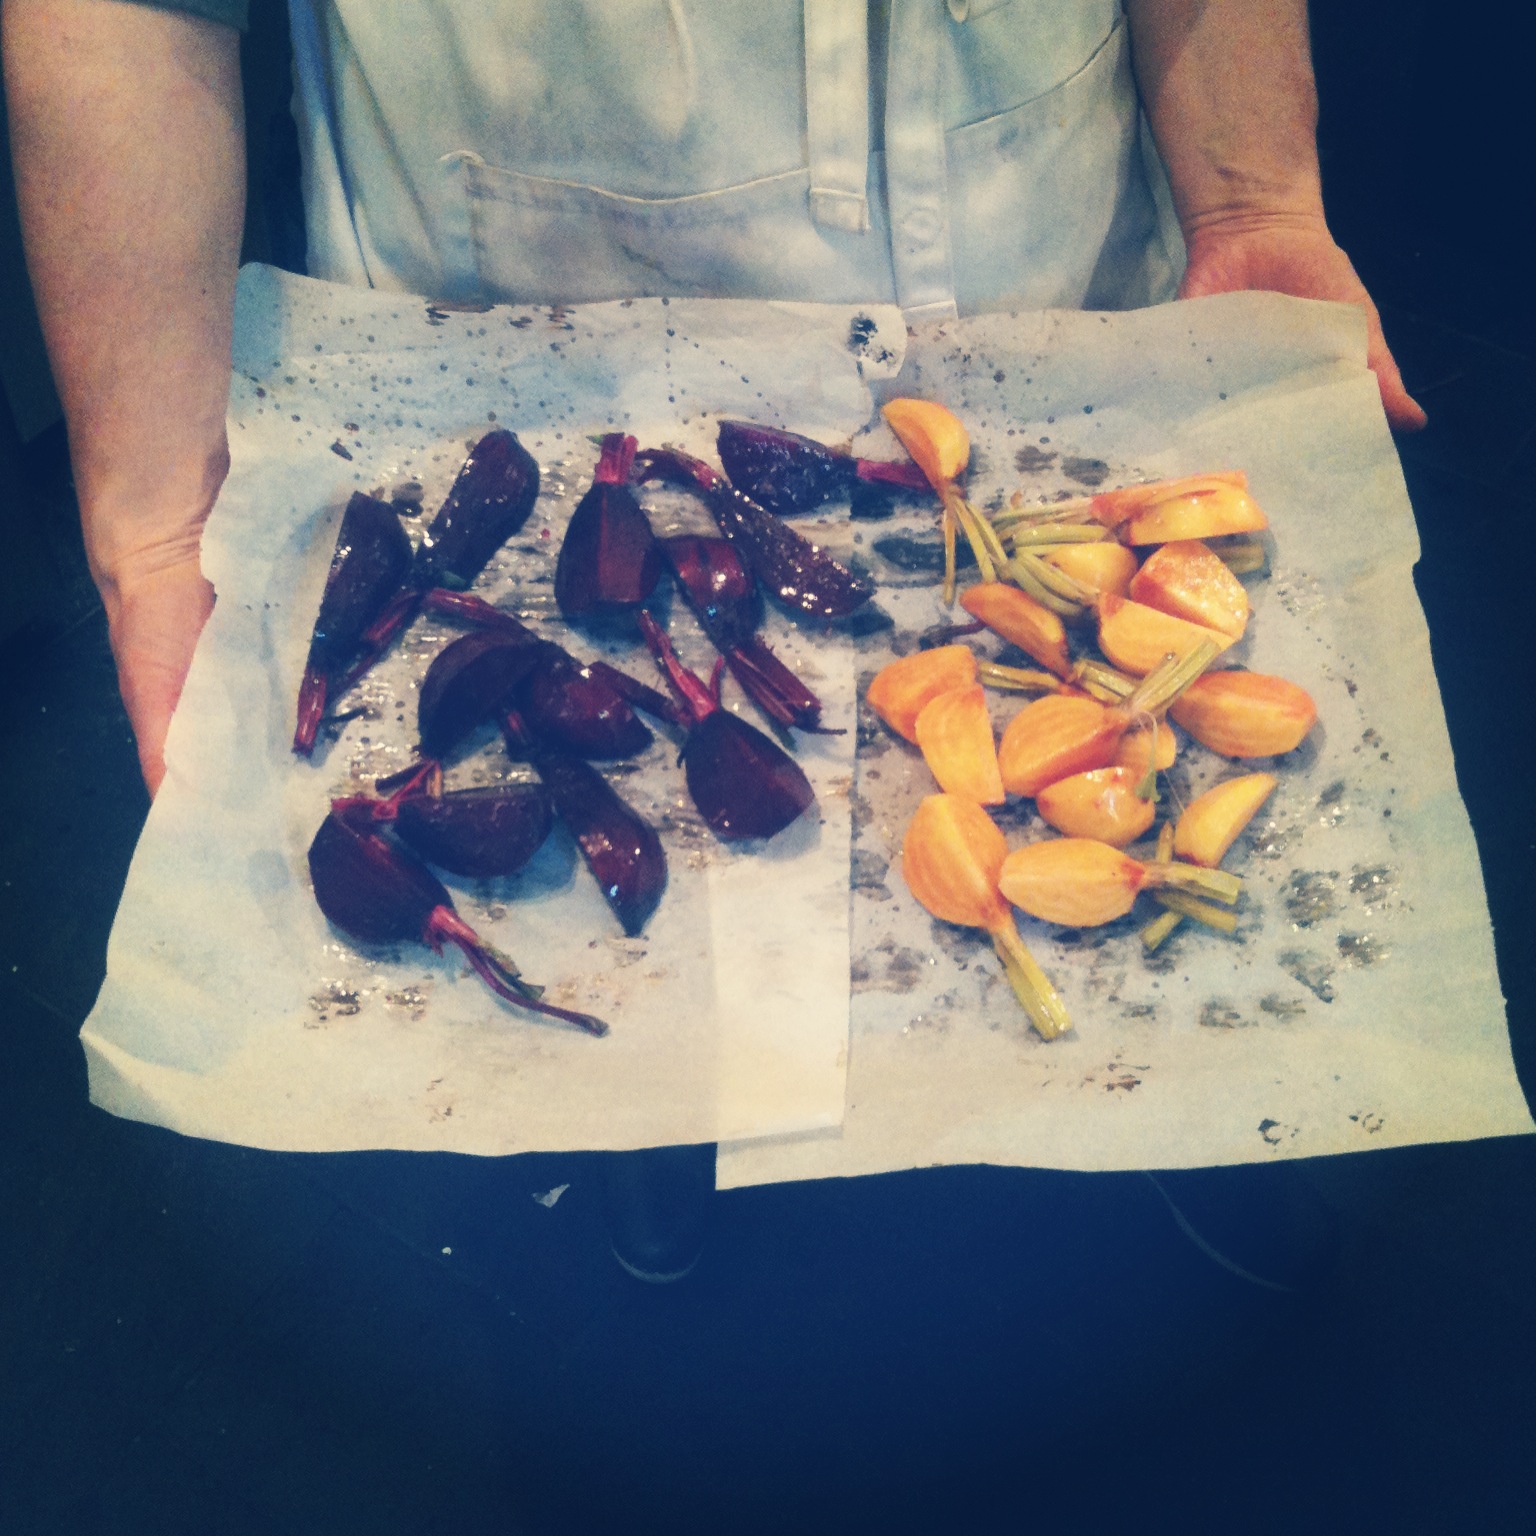
I prefer to leave an inch of the stem on my beets because it looks so pretty. One thing I love about this recipe is that it lets me use every single part of this vegetable.

So, here’s a recipe, right in time for Tu Bishvat, the birthday of the trees – to honour the beet – root and greens. Here is what you need:

  • 2-3 bunches of small beets with gorgeous and fresh greens attached  (for a visually eclectic and pretty salad try for red, golden and chioggia beets)
  • 3 tablespoons grapeseed oil
  • ¾ cup toasted walnuts, crumbled or shelled hazelnuts, chopped

The star of this salad is certainly the beets, but feel free to add some or all of these ingredients below:

  • ½ cup feta cheese, crumbled
  • ¼ cup good quality kalamata olives, pitted and chopped
  • ¼ red onion, sliced and marinated in red wine vinegar for 15 minutes or more
  • ½ cup fresh pomegranate seeds

Pomegranate/Silan dressing

  • 2 Tablespoons pomegranate molasses or silan (date honey)
  • ½ cup red wine vinegar (feel free to use the red wine vinegar from the onions)
  • 1 cup extra virgin olive oil
  • 1 teaspoon salt
  • 2 grinds pepper

Preheat the oven to 400 F. Line two baking trays with parchment paper. Separate the tops from the beets leaving about 1.5 inches of the stem. Clean and peel the beetroots and slice them into quarters, right through the roots and remaining stems. In a mixing bowl, toss the grapeseed oil and the beets (if you’re using gold and red beets, keep them totally separate so the golden colour stays golden). Roast for about 25 minutes, but check them every ten minutes, until they are tender but with some resistance and a bit of bite.

To serve, take a bunch of the beet greens, roll them up and slice thinly (or chiffonade). When the beets have cooled to room temperature, toss all the ingredients into a large mixing bowl. Combine all the dressing ingredients into jar or well sealed container and give it a good shake. Pour some of it over the salad, and leave some to spare. You want just enough to coat the vegetables, rather than take them swimming in dressing. I purposely got you to make extra dressing so you can use it for another salad and stop buying that crappy bottled stuff! Toss the salad well and serve at room temperature.

Chef’s tip: To skin hazelnuts easily, right after roasting, transfer all the nuts to a clean kitchen towel and wrap well. Rub the nuts through the towel for a minute or so, you should feel the skins come off. Open the towel and remove the nuts with loose open fingers, so most of the brown skins stay on the towel.

Posted on

The Ultimate Chocolate Chip Cookie: Four Levels of Chocolate with Lavender

Chocolate chip cookies are a truly American invention, and they’re still a treat this country knows how to do well. Better than me, perhaps, until I recently figured out some of the secrets behind a truly great cookie. I’m not a native, but I’m definitely a full-fledged immigrant Brooklynite, and that really must count for something. Another thing I must admit – I’m not a huge chocolate lover. I’ll eat chocolate sometimes, and I know when it’s quality. I’ve always been one of those people who choose white chocolate over “real” chocolate. That’s actually one of the reasons why I love this recipe. I use 100% crunchy cocoa nibs mixed with chunks of the whitest, least-chocolatey chocolate. And, of course, everything in between. Eating one of these cookies speckled with purple lavender or green tarragon and chunky grey salt is like going on a tour of Willy Wonka’s Chocolate Factory. It takes you for a ride. You’ll see.

TheUltimateChocolateChipCookie

Yield: makes about 3 dozen

Ingredients:

  • 1 ¼ cup whole wheat flour
  • 1 cup all-purpose flour
  • ½ teaspoon baking soda
  • 2 sticks butter, room softened (1 cup, 8 oz., 226 grams)
  • ¾ cup sugar
  • 1 tablespoon molasses (regular, unsulphured or blackstrap)
  • 1 teaspoon salt
  • 2 teaspoons pure vanilla extract
  • 2 eggs
  • 2 cups assorted chopped chocolate (a combination of white chocolate, milk chocolate, bittersweet, unsweetened & cocoa nibs)
  • 2 heaping teaspoons dried lavender (or fresh tarragon)
  • Pinch of Maldon, Sel Gris or Murray River Salt

Directions:

Preheat oven to 350 degrees. Prepare 2-3 trays lined with baking paper. In a small bowl whisk together both flours, the baking soda and the regular salt. In another bowl (or, an electric mixer would make life easier) beat together the butter, sugar and molasses until light and fluffy. Add the vanilla, eggs and mix well. Then add the flour and lavender. Stir in the chocolate.

Using two spoons, drop heaping tablespoon of the dough about 2 inches apart on the trays. Add 1-3 flakes of your choice of fancy salt on the top of each cookie.

Bake until cookies are golden around the edges, but still soft in the center, 8-10 minutes. Remove from oven and let cool on baking 1 to 2 minutes. Transfer to a wire rack and let cool completely.

These cookies won’t last long, but just so you know, they can last in a container for a few days and they also freeze well.

Posted on

Savory Garlic Greens – Kale

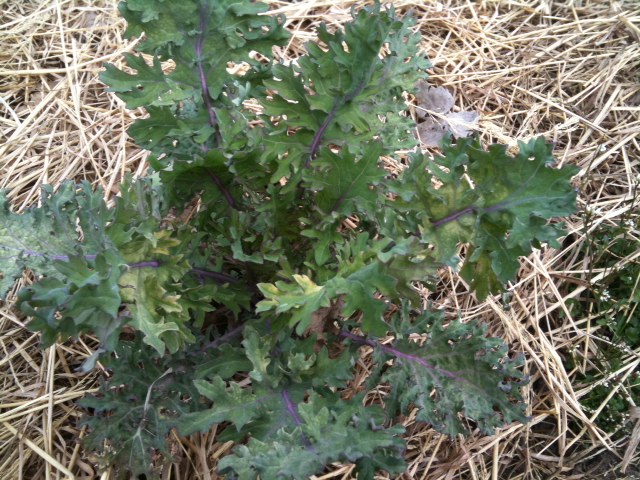
If you are looking for a nutritional bang for your buck, kale is where it’s at! This beautiful winter-hardy vegetable is currently in season, and it’s one of the most nutrient-dense vegetables you can eat! There are many different ways to enjoy kale, but here I will share with you my go-to recipe for delicious and savory dark-leafy greens.


A one-cup serving of kale provides 180 percent of the RDA (recommended daily allowance) for Vitamin A, 200 percent for Vitamin C, 1,020 percent RDA for Vitamin K, as well as 5 grams of fiber- with only 36 calories and 0 grams of fat! Per calorie, mineral-rich kale has more iron content than beef, and more calcium than milk. It is great for aiding in digestion and elimination with its high fiber content. It’s also high in antioxidants, folate and magnesium. Kale even contains omega-3 fatty acids (10% RDA in a 1 cup serving)! It’s really worth the effort to add this great-tasting and nutrient-rich vegetable to your diet!

Here’s what you will need to cook up some savory garlic greens:

  • 1 big bunch of kale (or any dark leafy greens of your choice
)
  • 2-3 cloves garlic
  • 3 tsp tamari soy sauce
  • 3 Tbsp 
olive oil

Directions: wash greens well and check for any bugs. De-stem the greens, then chop the leaves into thin strips. Coarsely chop the garlic, then coat your frying pan with olive oil and turn onto medium high heat. Add the garlic and sauté until the garlic is just starting to brown, about 1 minute. Add in the greens and sprinkle the tamari on top, then stir to coat the greens with the olive oil and tamari. Sauté on medium heat for about 3 minutes, until the greens have wilted, then cover and turn off the heat. Let the greens sit in the hot pan covered for 3-5 minutes. Even with the heat turned off, the greens will continue to steam and become more tender if left covered. These savory greens make a great side dish for most meals, and can be served over basmati rice or any whole grain of your choice.

Yield: 3-4 servings

I hope you enjoy your greens!

Do you want more ideas? See this current thread where Balaboostas members share their favorite kale recipes. They include soups, salads, and even kale chips! Yum. 

Posted on

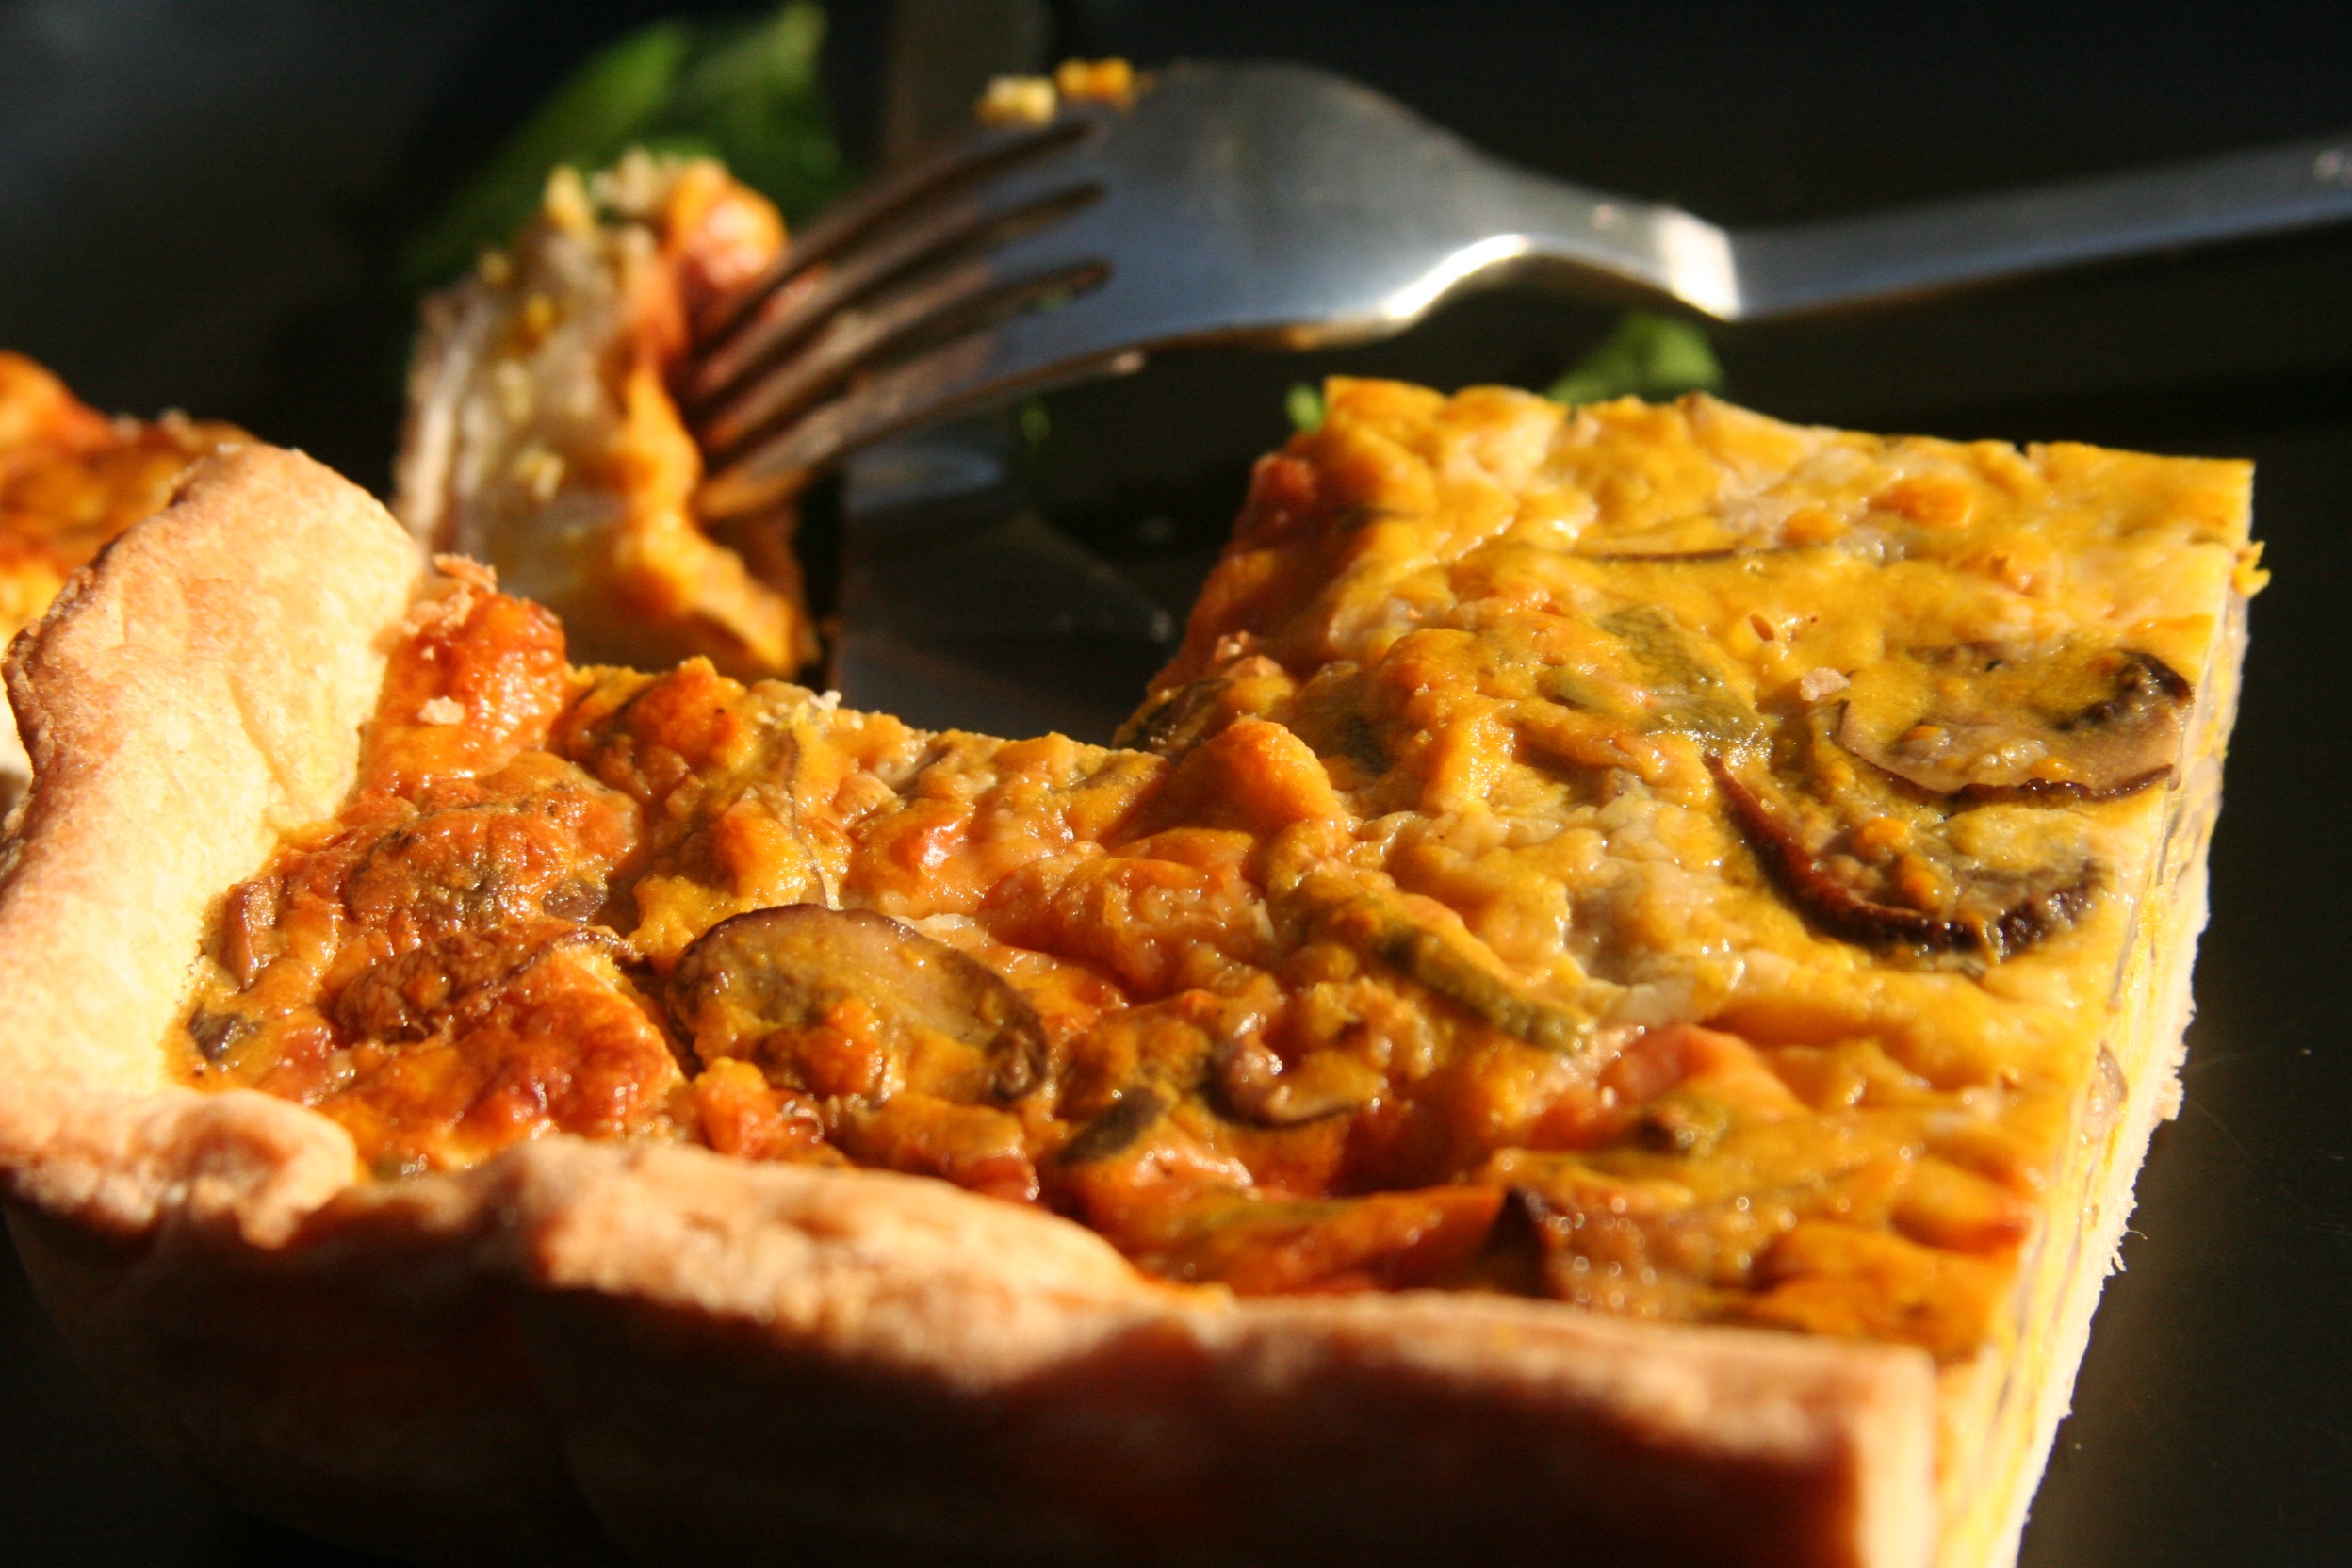
Pumpkin Sage Quiche

Fresh sage adds an irresistible flavour to this quiche. Come join The Hester’s event this Thursday, to get a taste of this fabulous food.

For the Pastry:

  • 1 1/2 cup whole grain pastry flour
  • good pinch salt
  • 8 tablespoons (1 stick) unsalted butter, cubed
  • 3-4 tablespoons ice water – or as much as you need for the dough to come together
  • 2 sprigs fresh thyme

Instructions: place the flour, butter and salt in the bowl of a food processor fitted with the steel blade. Pulse several times, until the mixture is uniform and resembles coarse meal. (If you don’t have a food processor, use a pastry cutter or 2 forks instead).

Transfer the crumbled almost-pastry to a mixing bowl and using a spatula, add the water one tablespoon at a time while working it in to the mixture until it comes together, forming into a dough. Turn the dough out onto a floured surface and gather it gently into a ball.

Roll the dough into a circle 11 inches or so in diameter (slightly bigger than a 10-inch round). Lift the dough and ease it into a 9-inch pie pan or 10-inch springform tart pan, nudging it gently into the corners. Form a generous, even edge all the way around the sides. Cover with plastic and refrigerate (or freeze) until ready to use.

For the Filling:

  • 1 tablespoon grapeseed oil
  • 1 pound shiitake mushrooms, stems trimmed and large caps sliced
  • 1 pound cremini mushrooms, thinly sliced
  • 1 cup shredded raw pumpkin
  • Salt and freshly ground pepper
  • 1 tablespoon unsalted butter
  • 1 onion, minced
  • 1 tablespoon fresh sage, chopped
  • ¾ cup shredded tasty cheese (cheddar, muenster, gouda etc.)
  • 2-3 cups sour cream
  • 5 large eggs, lightly beaten

Directions: preheat the oven to 350°. In a very large skillet, heat the oil. Add the mushrooms and sage cook over high heat, stirring, until starting to brown, about 3 minutes. Add the grated pumpkin, reduce the heat to moderate. Add the butter, onion and thyme and cook, stirring often, until the vegetables are tender, about 12 minutes longer. Season with salt and pepper and let cool.

Scatter half the cheese on the prepared crust. Beat the eggs with the sour cream. Add the vegetable mixture and pour it over the cheese. Scatter the remaining 1/4 cup of cheese on top.

Bake the quiche for about 1 1/2 hours, or until richly browned on top and the custard is barely set in the center. Enjoy!

Posted on

Organic Gluten Free Latkes

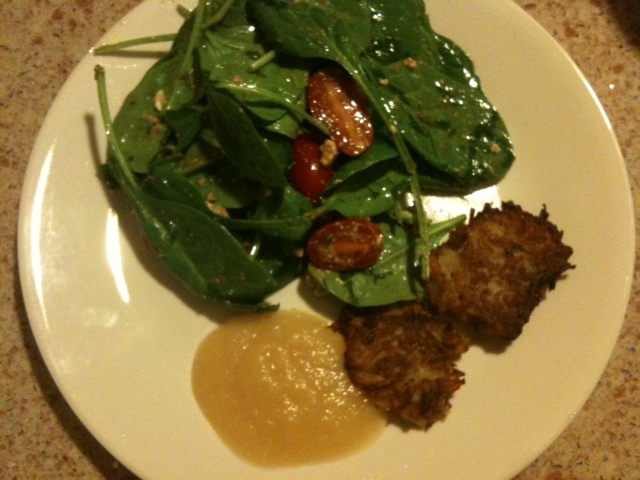
Are you looking for a perfect gluten free latke recipe for your family or guests? Look no further! These mini latkes have a classic taste and texture, and make a great appetizer for your Chanukah parties. These latkes are made extra small for an appealing presentation, and look beautiful when served with a big green salad and a side of organic applesauce!

Why make organic latkes?

Did you know that potatoes are one of the top 12 pesticide-contaminated foods? These top 12 most contaminated foods are known as “the dirty dozen” and include the fruits and vegetables that are most heavily laden with potentially harmful pesticide residue. The following is a list of the 12 most contaminated foods, followed by list of the 12 least contaminated foods. For those of us on a tight budget, simply substitute organic for the most contaminated foods whenever possible, and when buying conventional produce, stick to the least contaminated foods.

12 Most Contaminated:

▪ Peaches
▪ Apples
▪ Sweet Bell Peppers
▪ Celery
▪ Nectarines
▪ Strawberries
▪ Cherries
▪ Pears
▪ Grapes (Imported)
▪ Spinach
▪ Lettuce
▪ Potatoes

12 Least Contaminated:

▪ Onions
▪ Avocado
▪ Sweet Corn (Frozen)
▪ Pineapples
▪ Mango
▪ Asparagus
▪ Sweet Peas (Frozen)
▪ Kiwi Fruit
▪ Bananas
▪ Cabbage
▪ Broccoli
▪ Papaya

Now back to the latkes!  Here is what you will need to make your golden crispy gluten free latkes:

  • 2 pounds organic Yukon gold or Russet potatoes, peeled
  • 1 medium yellow onion, quartered
  • 1 egg
  • 1 1/2 teaspoons salt
  • 1 cup olive oil

Yield:  14-18 latkes

Directions: Peel your potatoes and place in a bowl of cold water. Using the grating disc of a food processor, grate the potatoes and place into a bowl. Using a cheesecloth, cloth napkin, or a strainer, squeeze as much liquid out of the potatoes as possible, reserving the potato liquid in a separate bowl. Let the liquid settle for five minutes, (your gluten free potato starch will settle to the bottom of the bowl). While the potato liquid settles, process the onion until smooth in the food processor and add to the grated potato. Slowly pour off the liquid from your bowl of potato liquid, and add the remaining potato starch to your grated potato mixture. Add in the egg and the salt and stir well.

Once your batter is ready, coat your frying pan with about 1/4 inch of olive oil, then turn up the heat. Add 1 heaping tablespoon of batter into the oil at a time, and flatten them slightly with your spatula.  Fry latkes until golden on the bottom- about 3 minutes on medium-high heat- then flip and fry until golden on the other side. When they are crispy and golden brown, remove from the pan and drain on paper towels if desired. Continue frying until all the batter is used up, adding in more oil to the pan as needed. Serve with organic applesauce and generous helping of your favorite green salad – and enjoy your delicious gluten free meal!

Wishing you all a Happy and Healthy Chanukah!

Posted on

Baked Cinnamon Doughnuts with Quince Cardamom Preserve

For years now, Chanuka has been synonymous with doughnuts. While gentiles are stringing up their lights, saddling up reindeer, and racking up huge electricity bills, we Jews are probably more focused on our usual preoccupation: food. Yes – miracles and wonders, olive oil, lights, transcending the physical too, but mainly food – deep fried food. We’re imaging the crispy and salty latkes and the moist creamy doughnuts. Many years ago, some clever person had the great idea to connect every single Jewish holiday to different foods, and these foods have become rituals in their own right. The whole idea at it’s core is pure outreach (so I guess a Lubavitcher thought of it?): the lost Jewish soul comes back to his grandparents’ Shabbos table with one good bowl of chicken soup.

The only thing that really connects doughnuts with Chanuka is the fact that doughnuts are deep fried, which is supposed to remind us of the miracle of the oil in the Temple. Considering the recipe I’m about to give you is for baked doughnuts, not fried ones, which might seem sacrilege to some, let me just defend myself in advance; I would never choose to deep-fry something if I could make it just as good another way. Deep-frying is messy, costly and when it’s all over, the smell lingers, and someone needs a facial.

If you’re thinking that you’d be better off just buying doughnuts, then yes, you have a point. It would be so much simpler if I could just bite into a commercial doughnut and taste good quality jam or REAL custard filling, but anyone who eats discerningly knows that most of the time, food you buy just isn’t all that great. It’s one of the big reasons I bother to cook at all (unless you thought it was the calluses and burns!).

If you make your own doughnuts and fillings this year, no matter which recipe you use, let your mind wander back to the story of Chanuka, and add some personal meaning to your own recipe. Think about the heroes of the story: The Maccabim, the people that physically cleaned the desecrated Temple, and the heroine Yehudit who seduced the Syrian-Greek general Holofernes with cheese and wine before beheading him. Deep fried food? We can be more creative than that – just the same way we are probably capable of deep-frying anything, I am almost certain we are capable of attributing connection and meaning to absolutely anything.

The idea of ‘transcending the physical’ stems from the fact that the miracle of Chanuka features the number 8. To explain; a 7-day week is the norm, and the bane of our existence, but the miracle of the oil burning lasted for a full eight days. Eight is not just any random number, it is just one more than seven. 8 teachers us to try and go beyond our comfort zones and our natural state of being.

So, as this Chanuka approaches, ask yourself, “do I want another average doughnut from an average bakery, or am I going to go beyond my usual limitations and make it myself?”

For the Doughnuts (adapted from 101 Cookbooks):

  • 1 1/3 cups warm milk, 95 to 105 degrees (divided)
  • 1 packet active dry yeast (2 1/4 teaspoons)
  • 2 tablespoons butter
  • 2/3 cup sugar
  • 2 eggs
  • 5 cups all-purpose flour (I use a blend of whole wheat and white or whole spelt)
  • A pinch or two of nutmeg, freshly grated if possible
  • 1 teaspoon fine grain sea salt
  • 1/2 cup unsalted butter, melted
  • 1 1/2 cups sugar
  • 1 tablespoon cinnamon

Directions: place 1/3 cup of the warm milk in the bowl of an electric mixer. Stir in the yeast and set aside for five minutes or so. Be sure your milk isn’t too hot or it will kill the yeast. Stir the butter and sugar into the remaining cup of warm milk and add it to the yeast mixture. With a fork, stir in the eggs, flour, nutmeg, and salt – just until the flour is incorporated. With the dough hook attachment of your mixer beat the dough for a few minutes at medium speed. This is where you are going to need to make adjustments – if your dough is overly sticky, add flour a few tablespoons at a time. Too dry? Add more milk a bit at a time. You want the dough to pull away from the sides of the mixing bowl and eventually become supple and smooth. Turn it out onto a floured counter-top, knead just a few times (the dough should be barely sticky), and shape into a ball.

Transfer the dough to a buttered (or oiled) bowl, cover, put in a warm place for an hour or until the dough has roughly doubled in size.

Punch down the dough and roll it out 1/2-inch thick on your floured countertop. Use an upside down small drinking glass or a 2-3 inch cookie cutter to make circles. Transfer the circles to a parchment-lined baking sheet. Cover with a clean cloth and let rise for another 45 minutes.

Bake in a 375 degree oven until the bottoms are just golden, 8 to 10 minutes – start checking around 8. While the doughnuts are baking, place the butter in a bowl and the sugar and cinnamon in another bowl, plate or ziploc bag.

Remove the doughnuts from the oven and using a pastry brush (or you can actually dip the doughnut into the bowl of butter) brush butter over each doughnut, then a quick toss in the sugar. Depending on how many you’re making, you can just throw all the doughnuts together in the ziploc bag and give it a shake. When I’m making a ton of these I spread the sugar mixture onto a baking tray and after brushing the butter, I turn the doughnuts around once to get coated.

Makes 1 1/2 – 2 dozen medium doughnuts.

For the Quince Cardamom Preserve:

  • 3-5 quinces, peeled and chopped
  • 3-4 apples and/or pears, chopped (no need to peel if you plan on blending).
  • 3 tablespoons sugar
  • zest and juice of one lemon
  • 1 cinnamon stick
  • 1 vanilla bean cut lengthwise
  • 3 cloves
  • 4 cardamom pods.

Here’s how: add everything to a heavy-bottomed pot. (Don’t mess around with the numbers of the spices unless you have a really good memory! Remember, whatever you put in, must come out so this way you have 1, 2, 3, 4 & 5…). Add enough water to barely cover the fruit, bring to a boil, then reduce the heat to low. Stir often, keep reducing the liquid and be careful not to let it burn. Some people use a crock pot and cook the fruit overnight and you can do that, but you can also just let it bubble for as little as an hour. The longer you let it cook, the thicker it will be. When enough is enough, remove all the spices (1, 2, 3, 4!) and blend if you prefer a smoother consistency.

You can preserve the fruit by doing the whole mason-jar 10 minute hot water bath but don’t bother with that right now. When the fruit has cooled, just slice ⅓ of the way through the doughnut and spread the fruit with a knife. You can also inject it like I did one year, getting very sticky hands and wasting a lot of time.

An Optional Glaze (rather than the cinnamon and sugar):

  •  1 cup unfiltered apple juice (“cider”)
  • 2, 1 inch pieces ginger
  • 1 cup powdered/icing sugar
  • ½ teaspoon cinnamon

Like this: put the apple juice and the ginger into a small pot and boil. Keep reducing until less than half is left. When cooled, prepare the icing by combining the sugar and cinnamon and slowly add tablespoons of the reduced apple ginger mixture. Whisk until smooth. Place a wire cooling rack over a piece of parchment paper. When doughnuts are cool, dip tops into the glaze and let them rest on a wire rack until the glaze hardens.

Happy Chanukah!


Posted on

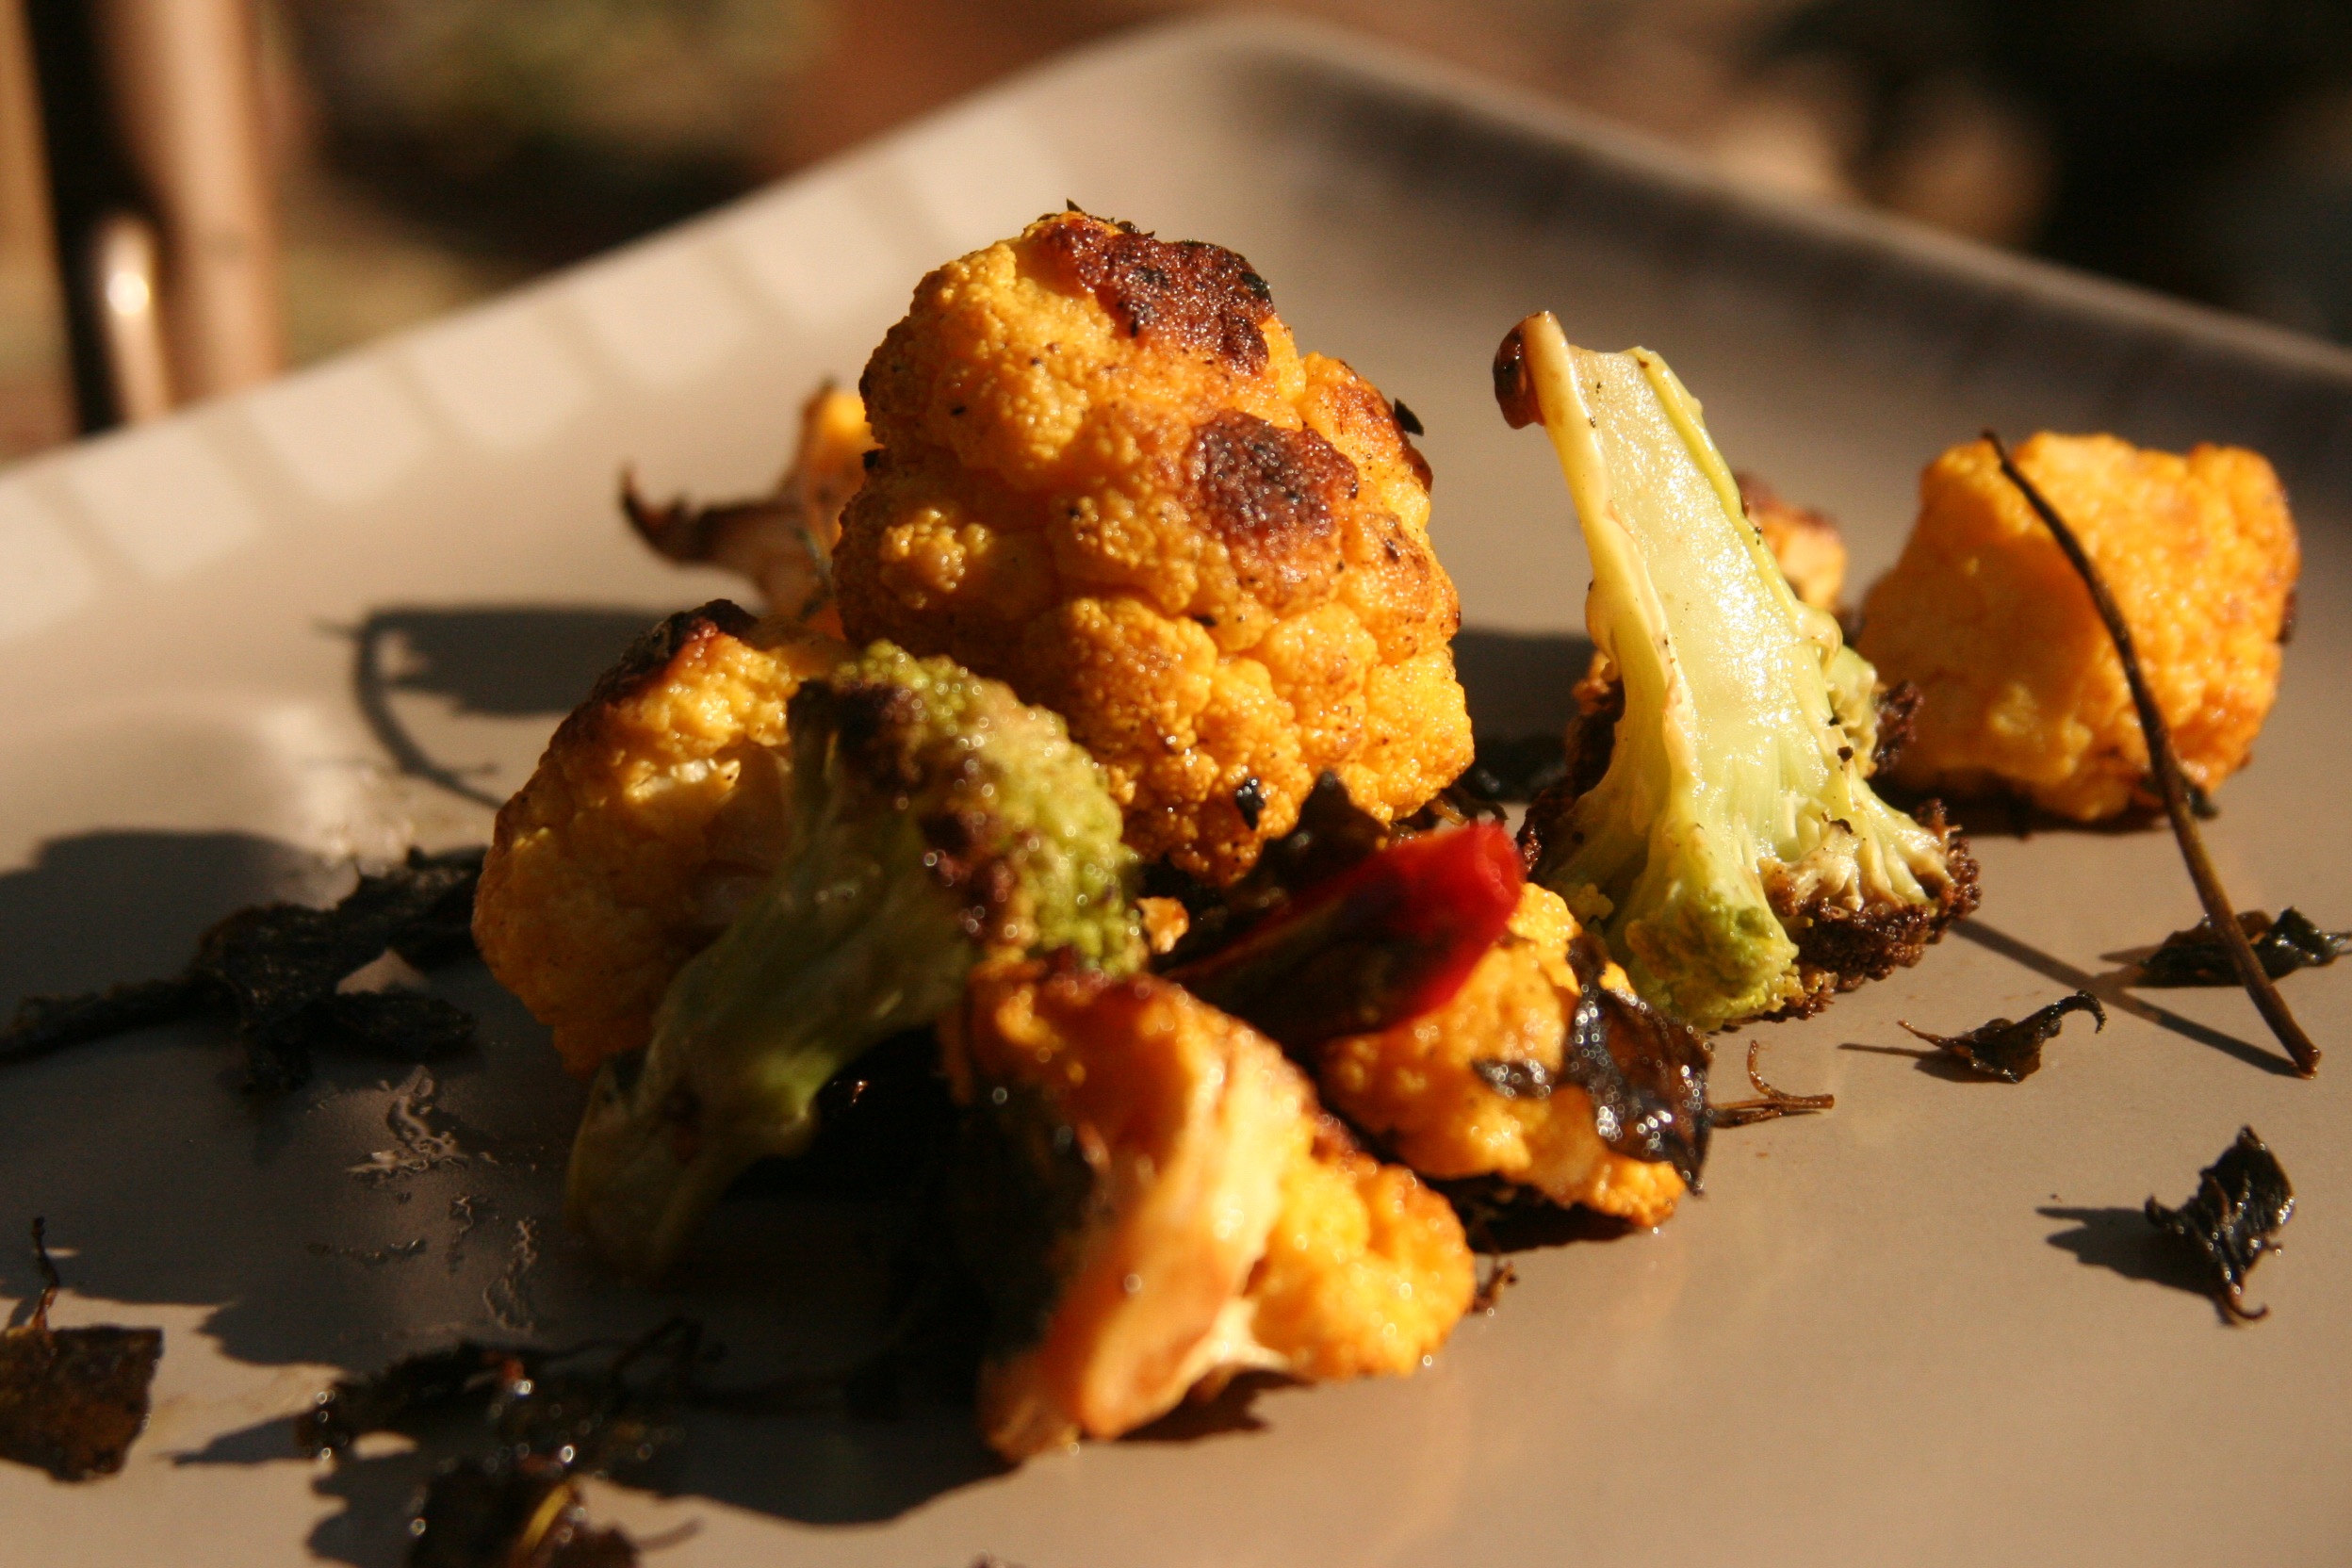
Tri-coloured Cauliflower with Fresh Oregano

Cauliflower is one of the more versatile stars of the vegetable kingdom. It’s delicious raw, marinated or pickled, but when cooked, cauliflower takes on an almost meaty flavour. When baked with cheese, it’s so hearty and satisfying that it’s easy to forget you’re eating a vegetable at all. Aesthetically, it’s a cousin of broccoli, but beyond that, completely different. Roasted until brown and very colourful in this recipe, cauliflower takes on a new enticing dimension. Serve with a rich fatty fish like salmon, or with brisket and lightly steamed leafy greens.

Here is what you’ll need:

  • 3 heads of cauliflower, cut or broken into florets (If you can get a variety, available right now in the New York area, it will look gorgeous, I’ve seen purple, orange, green and romanesco.)
  • 1 small bunch fresh oregano
  • 1 cup chopped parsley (optional)
  • Soft butter or/and oil (¼ cup approximately)
  • Sea salt
  • Freshly ground black pepper
  • 3 red chilli or habanero peppers

Directions: Preheat oven to 400 F or 205 C. Line two large baking trays or cookie sheets with parchment or baking paper. Place florets into a large mixing bowl. Strip the leaves off five oregano sprigs and throw them over the cauliflower. Discard the stems. Throw the rest of the oregano sprigs over the cauliflower as well. Put two sprigs aside for presentation. Pour the oil into the bowl or add the butter (or both). Sprinkle the salt, about two tablespoons, but err on the side of less because you can always add more later. Grind a bunch of black pepper, maybe six grinds total. Throw in the peppers whole. Toss the veggies and the herbs well. Spread in a single layer over both baking sheets and roast until “al dente”, soft, but with a bite, about 20 minutes.

Chef’s tip: If you need more space either roast in shifts or get another tray. If you pile up the cauliflower, it will steam instead of roasting.

Photograph by Itta Werdiger Roth

Posted on Leave a comment

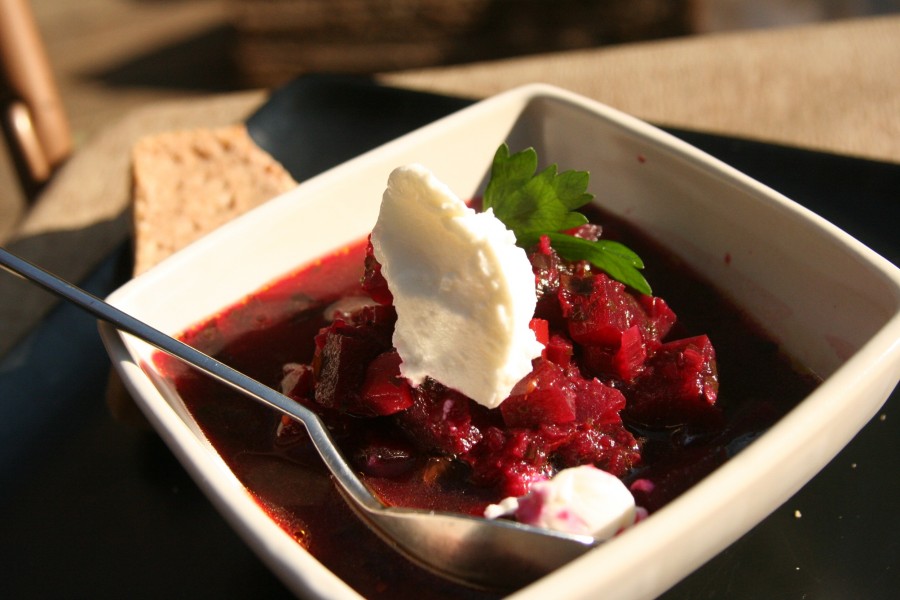
Autumn Borscht

There are more versions of borscht than I can list or even know about, most of the recipes originating from various Eastern European countries. Hot or cold, as a drink or as a soup over hot potatoes, or as a warm meaty stew, borscht is one of the most argued-over dishes. People are often consumed with the question of “what is the REAL original recipe?”, so here’s what I think: I’m a cook, not an archaeologist, and I couldn’t care less whether Russians would use caraway seeds in borscht! This recipe is delicious and very autumnal; enjoy!

Here’s what you’ll need:

  • 3 Tablespoons of grape-seed oil (or/and butter)
  • 2 onions, peeled and diced
  • 1/2 head of garlic, thinly sliced/minced
  • Generous pinch of caraway seeds
  • 4 medium carrots, chopped
  • 2-3 yukon potatoes, chopped
  • 2 parsnips, peeled and chopped
  • 1 bunch red beets, peeled and chopped
  • 4 cups water (approximately)
  • 2 teaspoons kosher salt
  • 1/2 of a squeezed lemon (juice)
  • 1 tablespoon brown sugar
  • 1/4 cup apple cider vinegar
  • 1 cup chopped parsley and/or dill & beet greens
  • Freshly ground black pepper
  • Sour cream or plain yogurt to serve

Directions: heat the oil in a large stock pot. Add the onions, and saute until translucent. Add the garlic and caraway seeds and stir until fragrant, about 2 minutes. Add the carrots, potatoes and beets. Cook over medium heat for about 5 minutes, until the vegetables have started to soften. Add the water, salt, sugar, vinegar and bring to a boil. Reduce heat, and simmer for 30 to 45 minutes until all the vegetables are tender. Stir in the greens and lemon juice, simmer for a minute, and then add black pepper to taste.
Serve warm with fresh dill and sour cream.

Chef’s tips: Please feel comfortable to measure very approximately. This is a rustic village-style dish and exactness is not necessary. You can make it more soupy or more stew-like depending on how much water you add. This recipe can easily be adapted to be made with beef (Jews: without the sour cream of course!). You can brown small pieces of beef stew on the side and throw them in at the same time as you add the beets.

Serves 4 as main course, 6 as an appetizer

Photograph by Itta Werdiger Roth